
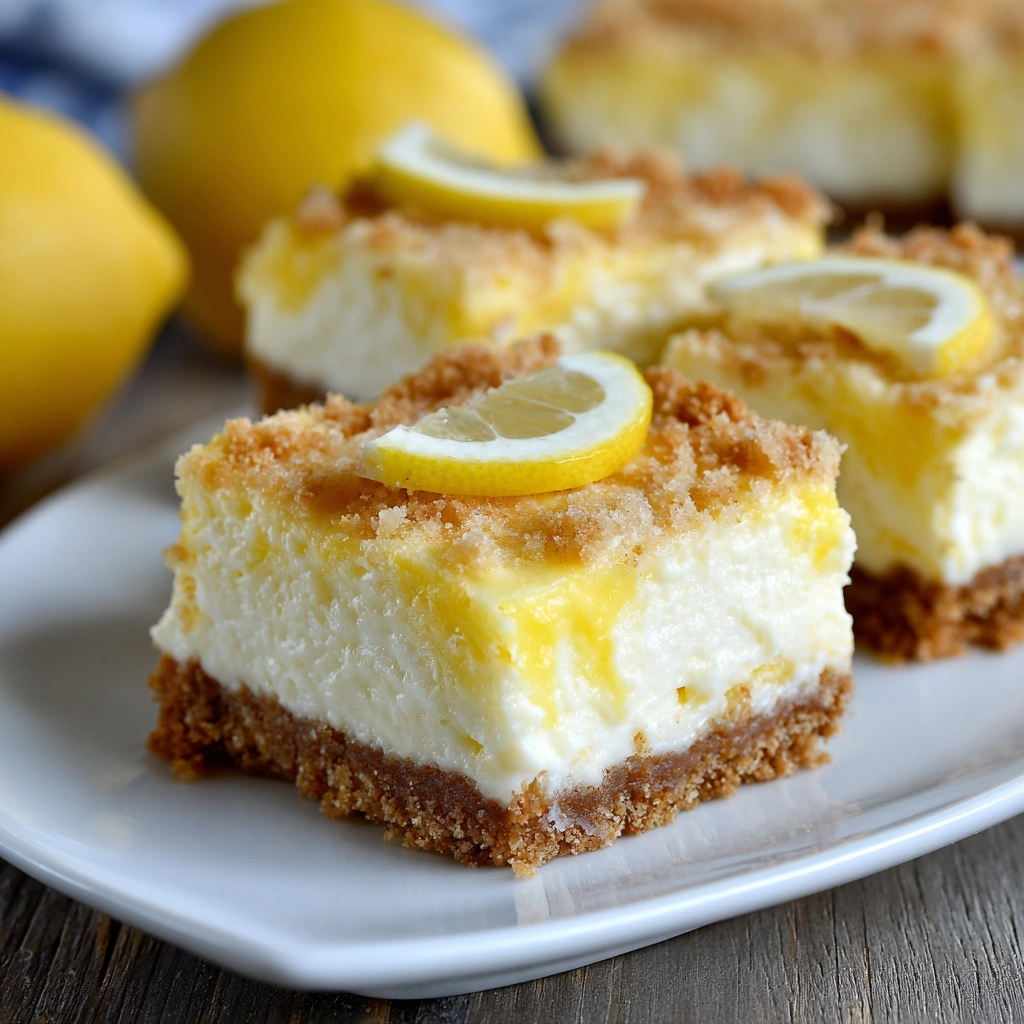
Best Lemon Marbled Cheesecake Bars You Must Try Today!
Introduction to Best Lemon Marbled Cheesecake Bars
As a busy mom, I know how precious time can be, especially when it comes to whipping up something delicious. That’s why I’m excited to share my recipe for the Best Lemon Marbled Cheesecake Bars. These bars are not just a treat; they’re a delightful way to brighten your day. With their creamy texture and zesty lemon flavor, they’re perfect for impressing guests or simply indulging yourself after a long day. Plus, they’re easy to make, so you can enjoy a slice of happiness without spending hours in the kitchen!
Why You’ll Love This Best Lemon Marbled Cheesecake Bars
These Best Lemon Marbled Cheesecake Bars are a game-changer for anyone who loves dessert but is short on time. They come together quickly, making them perfect for busy weeknights or last-minute gatherings. The combination of creamy cheesecake and bright lemon flavor creates a taste sensation that’s hard to resist. Plus, they’re a hit with both kids and adults, ensuring everyone leaves the table with a smile!
Ingredients for Best Lemon Marbled Cheesecake Bars
Gathering the right ingredients is the first step to creating these delightful bars. Here’s what you’ll need:
- Graham cracker crumbs: These form the buttery crust that holds everything together. You can use store-bought or crush your own for a fresher taste.
- Unsalted butter: Melted butter adds richness to the crust. Using unsalted allows you to control the saltiness of the final dish.
- Cream cheese: The star of the show! Softened cream cheese gives the bars their creamy texture. Make sure it’s at room temperature for easy mixing.
- Granulated sugar: This sweetens the cheesecake filling, balancing the tartness of the lemon.
- Eggs: They provide structure and stability to the cheesecake. Adding them one at a time ensures a smooth mixture.
- Vanilla extract: A splash of vanilla enhances the overall flavor, making it more aromatic and delicious.
- Sour cream: This adds a tangy richness to the filling, making it extra creamy.
- Fresh lemon juice: The key ingredient for that zesty flavor! Freshly squeezed juice is always best for a vibrant taste.
- Lemon zest: This adds an extra punch of lemon flavor without the acidity. It’s like sunshine in a bite!
For those looking to experiment, consider adding more lemon zest for a stronger flavor or using a gluten-free graham cracker alternative for a gluten-free version. You can find the exact measurements for these ingredients at the bottom of the article, ready for printing!
How to Make Best Lemon Marbled Cheesecake Bars
Now that you have your ingredients ready, let’s dive into the fun part—making the Best Lemon Marbled Cheesecake Bars! Follow these simple steps, and you’ll have a delicious dessert that will impress everyone.
Step 1: Preheat the Oven
First things first, preheat your oven to 325°F (160°C). Preheating is crucial because it ensures even baking. If you skip this step, your cheesecake bars might not set properly. Trust me, you want that perfect creamy texture!
Step 2: Prepare the Crust
In a mixing bowl, combine your graham cracker crumbs and melted butter. Stir until everything is well mixed. The mixture should resemble wet sand. Now, press it firmly into the bottom of a greased 9×13 inch baking dish. Pressing it down well is key; this will create a sturdy base for your cheesecake bars.
Step 3: Make the Cheesecake Filling
In a large mixing bowl, beat the softened cream cheese and granulated sugar together until smooth. This is where the magic begins! Next, add the eggs one at a time, mixing well after each addition. This step is important because it helps to create a silky-smooth filling without lumps.
Step 4: Combine Flavors
Now it’s time to add the flavor! Stir in the vanilla extract, sour cream, fresh lemon juice, and lemon zest. Each ingredient plays a role in balancing the flavors. The sour cream adds creaminess, while the lemon juice and zest give that refreshing zing. Mix until everything is well combined.
Step 5: Assemble the Bars
Pour half of the cheesecake mixture over the crust, spreading it evenly. Then, drop spoonfuls of the remaining mixture on top. Here comes the fun part! Use a knife to swirl the mixtures together, creating a beautiful marbled effect. Don’t worry about perfection; the swirls will look stunning once baked!
Step 6: Bake to Perfection
Place your baking dish in the preheated oven and bake for 30-35 minutes. Keep an eye on it! The center should be set but still slightly jiggly. Once done, remove it from the oven and let it cool at room temperature. After cooling, refrigerate for at least 4 hours before cutting into bars. This chilling time helps the flavors meld beautifully!
Tips for Success
- Use room temperature cream cheese for a smoother filling.
- Don’t skip the chilling time; it enhances the flavor and texture.
- For a cleaner cut, use a sharp knife and wipe it between slices.
- Experiment with different citrus zest for a unique twist.
- Store leftovers in an airtight container to keep them fresh.
Equipment Needed
- 9×13 inch baking dish: A standard size for these bars. You can use a glass or metal dish.
- Mixing bowls: A set of various sizes will help with mixing ingredients.
- Electric mixer: A hand mixer or stand mixer makes beating the cream cheese easier.
- Spatula: Perfect for spreading the cheesecake mixture evenly.
- Knife: Essential for swirling and cutting the bars once they’re set.
Variations
- Berry Swirl: Add a swirl of raspberry or blueberry puree for a fruity twist.
- Chocolate Drizzle: Drizzle melted chocolate over the top for a decadent touch.
- Gluten-Free Option: Use gluten-free graham crackers or almond flour for the crust.
- Vegan Version: Substitute cream cheese with a vegan alternative and use flax eggs.
- Herbal Infusion: Add a hint of fresh mint or basil for a unique flavor profile.
Serving Suggestions
- Pair with a dollop of whipped cream for added creaminess.
- Serve alongside fresh berries for a pop of color and flavor.
- Enjoy with a cup of herbal tea or a refreshing lemonade.
- Garnish with mint leaves for a beautiful presentation.
- Cut into small squares for bite-sized treats at gatherings.
FAQs about Best Lemon Marbled Cheesecake Bars
Can I use store-bought lemon juice instead of fresh?
While you can use store-bought lemon juice, fresh lemon juice gives a brighter, more vibrant flavor. If you have the time, I highly recommend squeezing your own lemons for the best results!
How do I know when the cheesecake bars are done baking?
The cheesecake bars are done when the edges are set, but the center still has a slight jiggle. They will continue to firm up as they cool, so don’t overbake!
Can I freeze the Best Lemon Marbled Cheesecake Bars?
Absolutely! These bars freeze well. Just wrap them tightly in plastic wrap and then in aluminum foil. They can be stored in the freezer for up to three months. Thaw in the refrigerator before serving.
What can I do if my cheesecake bars crack on top?
Cracks can happen, but they don’t affect the taste! To prevent them, avoid overmixing and ensure your oven temperature is accurate. If cracks do appear, a dusting of powdered sugar can cover them up beautifully!
How long do the cheesecake bars last in the fridge?
These bars can be stored in the refrigerator for up to a week. Just make sure they’re in an airtight container to keep them fresh and delicious!
Final Thoughts
Making the Best Lemon Marbled Cheesecake Bars is more than just a cooking task; it’s a delightful experience that brings joy to your kitchen. The vibrant lemon flavor dances on your taste buds, while the creamy texture melts in your mouth. Whether you’re sharing them with family or savoring a quiet moment alone, these bars are sure to brighten your day. Plus, the smiles on your loved ones’ faces when they take that first bite? Priceless! So, roll up your sleeves and dive into this recipe; happiness is just a slice away!
Print
Best Lemon Marbled Cheesecake Bars You Must Try Today!
- Total Time: 4 hours 55 minutes
- Yield: 12 bars 1x
- Diet: Vegetarian
Description
Delicious and creamy lemon marbled cheesecake bars with a buttery crust, perfect for dessert lovers.
Ingredients
- 1 ½ cups graham cracker crumbs
- ½ cup unsalted butter, melted
- 2 cups cream cheese, softened
- 1 cup granulated sugar
- 3 large eggs
- 1 teaspoon vanilla extract
- ½ cup sour cream
- ½ cup fresh lemon juice
- 1 tablespoon lemon zest
Instructions
- Preheat the oven to 325°F (160°C).
- In a bowl, mix graham cracker crumbs and melted butter until combined.
- Press the mixture into the bottom of a greased 9×13 inch baking dish.
- In a large mixing bowl, beat cream cheese and sugar until smooth.
- Add eggs one at a time, mixing well after each addition.
- Stir in vanilla extract, sour cream, lemon juice, and lemon zest until well combined.
- Pour half of the cheesecake mixture over the crust.
- Drop spoonfuls of the remaining mixture on top and swirl with a knife to create a marbled effect.
- Bake for 30-35 minutes or until the center is set.
- Let cool, then refrigerate for at least 4 hours before cutting into bars.
Notes
- For a stronger lemon flavor, add more lemon zest.
- These bars can be stored in the refrigerator for up to a week.
- Serve chilled for the best texture.
- Prep Time: 20 minutes
- Cook Time: 35 minutes
- Category: Dessert
- Method: Baking
- Cuisine: American
Nutrition
- Serving Size: 1 bar
- Calories: 250
- Sugar: 18g
- Sodium: 200mg
- Fat: 15g
- Saturated Fat: 9g
- Unsaturated Fat: 4g
- Trans Fat: 0g
- Carbohydrates: 25g
- Fiber: 1g
- Protein: 4g
- Cholesterol: 70mg
Keywords: Lemon Cheesecake, Cheesecake Bars, Dessert Recipes