
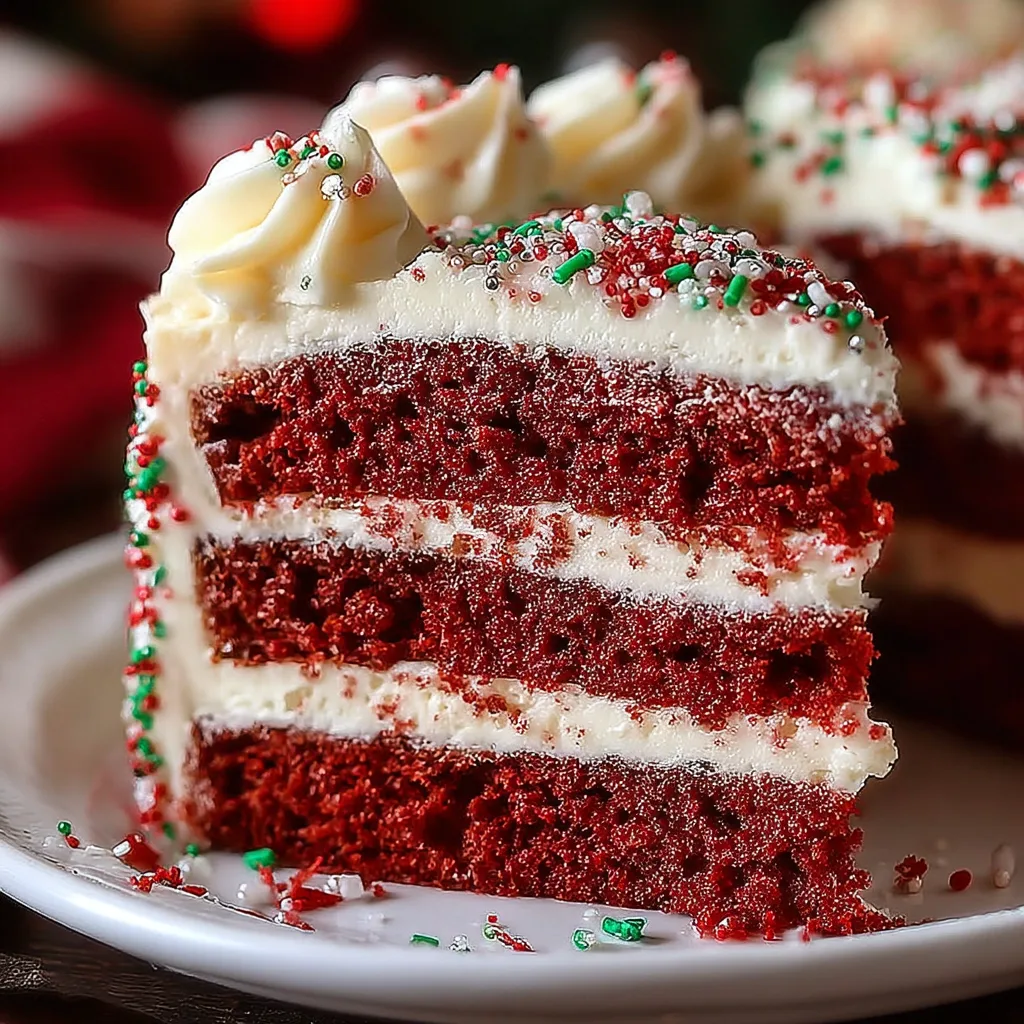
Festive Red Velvet Layer Cake with Vanilla Cream Frosting
Introduction to Festive Red Velvet Layer Cake with Vanilla Cream Frosting
There’s something magical about a Festive Red Velvet Layer Cake with Vanilla Cream Frosting that instantly brightens any occasion. Whether it’s a birthday, holiday gathering, or just a cozy family dinner, this cake is sure to impress. I know how busy life can get, especially for us moms juggling a million things. This recipe is not just a treat; it’s a quick solution that brings joy and deliciousness to your table. Trust me, your loved ones will be asking for seconds, and you’ll feel like a superstar in the kitchen!
Why You’ll Love This Festive Red Velvet Layer Cake with Vanilla Cream Frosting
This Festive Red Velvet Layer Cake with Vanilla Cream Frosting is a delightful blend of flavor and simplicity. It’s easy to whip up, making it perfect for busy days when you want to impress without the stress. The rich, velvety texture paired with the creamy frosting creates a taste sensation that’s hard to resist. Plus, it’s visually stunning, ensuring it steals the spotlight at any gathering!
Ingredients for Festive Red Velvet Layer Cake with Vanilla Cream Frosting
Gathering the right ingredients is the first step to creating your Festive Red Velvet Layer Cake with Vanilla Cream Frosting. Here’s what you’ll need:
- All-purpose flour: This is the backbone of your cake, providing structure and texture.
- Granulated sugar: Sweetness is key! It helps balance the flavors and keeps the cake moist.
- Baking soda: This leavening agent gives your cake that lovely rise.
- Salt: Just a pinch enhances the flavors and balances the sweetness.
- Cocoa powder: A hint of cocoa adds depth to the flavor without overpowering the red velvet essence.
- Vegetable oil: This keeps the cake moist and tender, making each bite melt in your mouth.
- Buttermilk: The acidity in buttermilk reacts with the baking soda, creating a light and fluffy texture.
- Eggs: They bind everything together and add richness to the cake.
- Red food coloring: This is what gives the cake its signature vibrant hue. Don’t skimp on it!
- Vanilla extract: A splash of vanilla adds warmth and enhances the overall flavor.
- White vinegar: This might seem odd, but it helps to activate the baking soda and adds a subtle tang.
For the frosting, you’ll need:
- Powdered sugar: This sweetens the frosting and gives it that smooth, creamy texture.
- Unsalted butter: Softened butter is essential for a rich and creamy frosting.
- Vanilla extract (for frosting): Just like in the cake, it adds a lovely flavor to the frosting.
- Heavy cream (optional): Adding this can make your frosting lighter and fluffier, perfect for layering.
For exact measurements, check the bottom of the article where you can find everything listed for easy printing. Happy baking!
How to Make Festive Red Velvet Layer Cake with Vanilla Cream Frosting
Step 1: Preheat and Prepare
First things first, let’s get that oven preheating to 350°F (175°C). While it warms up, grab three 9-inch round cake pans. Grease and flour them well to ensure your cakes slide out easily later. I like to use a bit of parchment paper at the bottom for extra insurance. This little trick saves you from any cake disasters. Trust me, it’s worth the extra step!
Step 2: Mix Dry Ingredients
Now, let’s sift together the dry ingredients. In a large bowl, combine the all-purpose flour, granulated sugar, baking soda, salt, and cocoa powder. Sifting is key here; it aerates the flour and helps create a light, fluffy cake. Plus, it breaks up any lumps. As you mix, take a moment to enjoy the sweet aroma of the sugar and cocoa. It’s like a warm hug for your senses!
Step 3: Combine Wet Ingredients
In another bowl, it’s time to mix the wet ingredients. Whisk together the vegetable oil, buttermilk, eggs, red food coloring, vanilla extract, and white vinegar. Make sure everything is well combined. The vibrant red color will start to shine through, and it’s a sight to behold! This mixture is what gives our cake that rich, velvety texture. Don’t rush this step; it’s where the magic begins!
Step 4: Combine Wet and Dry Ingredients
Now, let’s bring it all together! Gradually add the wet mixture to the dry ingredients. I like to do this in three parts, mixing gently after each addition. You want to combine them just until you see no more flour streaks. Overmixing can lead to a dense cake, and we want it light and airy. The batter should be smooth and luscious, ready to be transformed into a cake!
Step 5: Bake the Cake
Divide the batter evenly among the prepared cake pans. I usually use a kitchen scale for accuracy, but a good eyeball works too! Bake in your preheated oven for 25-30 minutes. Keep an eye on them; every oven is a little different. You’ll know they’re done when a toothpick inserted in the center comes out clean. The smell wafting through your kitchen will be heavenly!
Step 6: Cool the Cakes
Once baked, let the cakes cool in the pans for about 10 minutes. This helps them set and makes them easier to remove. After that, gently transfer them to wire racks to cool completely. Patience is key here! If you frost them while they’re still warm, the frosting will melt, and we don’t want that. Let them cool down to room temperature for the best results.
Step 7: Make the Frosting
While the cakes cool, let’s whip up that dreamy vanilla cream frosting! In a mixing bowl, beat the softened unsalted butter until it’s creamy and smooth. Gradually add the powdered sugar and vanilla extract, mixing until it’s well combined. If you want a lighter texture, add a splash of heavy cream. This frosting is rich and velvety, perfect for layering between those beautiful cake layers!
Step 8: Assemble the Cake
Now comes the fun part—assembling your cake! Start by placing one layer on a serving plate. Spread a generous amount of frosting on top, then add the second layer and repeat. Once you’ve stacked all three layers, frost the top and sides of the cake. Don’t worry about perfection; a rustic look adds charm! Decorate as you like, and get ready to impress your family and friends!
Tips for Success
- Always use room temperature ingredients for a smoother batter.
- Don’t skip the sifting step; it makes a big difference in texture.
- Keep an eye on your cakes while baking; ovens can vary.
- Let the cakes cool completely before frosting to avoid melting.
- For a festive touch, add sprinkles or fresh berries on top!
Equipment Needed
- 9-inch round cake pans: If you don’t have these, use square pans or a single larger pan.
- Mixing bowls: Any size will do; just ensure they’re sturdy.
- Whisk: A hand mixer works great too for a quicker mix.
- Cooling racks: If you lack these, a plate or cutting board can work in a pinch.
Variations
- Chocolate Red Velvet: Add an extra tablespoon of cocoa powder for a richer chocolate flavor.
- Gluten-Free Option: Substitute all-purpose flour with a gluten-free blend for a delicious alternative.
- Vegan Version: Replace eggs with flaxseed meal and use plant-based milk and butter for a vegan-friendly cake.
- Spiced Red Velvet: Add a teaspoon of cinnamon or nutmeg for a warm, spiced twist.
- Fruit-Filled Layers: Incorporate layers of fresh strawberries or raspberries between the cake layers for a fruity surprise.
Serving Suggestions
- Pair with a scoop of vanilla ice cream for a delightful contrast.
- Serve alongside fresh berries to add a pop of color and freshness.
- Complement with a cup of coffee or tea for a cozy treat.
- For a festive touch, garnish with edible flowers or sprinkles.
FAQs about Festive Red Velvet Layer Cake with Vanilla Cream Frosting
Can I make this cake ahead of time?
Absolutely! You can bake the layers a day in advance. Just wrap them tightly in plastic wrap and store them in the fridge. Frosting can also be made ahead and stored in the fridge. Just give it a quick whip before using!
What can I substitute for buttermilk?
If you don’t have buttermilk on hand, don’t worry! You can make a quick substitute by mixing one cup of milk with a tablespoon of vinegar or lemon juice. Let it sit for about 5 minutes, and you’re good to go!
How do I store leftovers?
Store any leftover cake in an airtight container in the refrigerator. It should stay fresh for about 3-4 days. Just be sure to let it come to room temperature before serving for the best flavor!
Can I freeze the cake?
Yes, you can freeze the cake! Wrap the layers tightly in plastic wrap and then in aluminum foil. They can be frozen for up to 3 months. Just thaw in the fridge overnight before frosting and serving.
What’s the best way to decorate the cake?
Get creative! You can use fresh berries, edible flowers, or even chocolate shavings for a beautiful finish. A sprinkle of festive sprinkles can add a fun touch, especially for special occasions!
Final Thoughts
Creating a Festive Red Velvet Layer Cake with Vanilla Cream Frosting is more than just baking; it’s about making memories. The joy of watching your loved ones’ faces light up as they take that first bite is priceless. This cake brings people together, whether it’s for a birthday, holiday, or just a simple family gathering. Plus, it’s a delightful way to express your love through food. So, roll up your sleeves, embrace the mess, and enjoy the process. Trust me, the smiles and compliments will make every moment in the kitchen worth it!
Print
Festive Red Velvet Layer Cake with Vanilla Cream Frosting awaits your taste!
- Total Time: 1 hour
- Yield: 12 servings 1x
- Diet: Vegetarian
Description
A delicious and visually stunning red velvet layer cake topped with creamy vanilla frosting, perfect for festive occasions.
Ingredients
- 2 1/2 cups all-purpose flour
- 1 1/2 cups granulated sugar
- 1 teaspoon baking soda
- 1 teaspoon salt
- 1 teaspoon cocoa powder
- 1 1/2 cups vegetable oil
- 1 cup buttermilk, room temperature
- 2 large eggs, room temperature
- 2 tablespoons red food coloring
- 1 teaspoon vanilla extract
- 1 teaspoon white vinegar
- 4 cups powdered sugar
- 1 cup unsalted butter, softened
- 1 teaspoon vanilla extract (for frosting)
- 1/4 cup heavy cream (optional, for frosting)
Instructions
- Preheat the oven to 350°F (175°C) and grease and flour three 9-inch round cake pans.
- In a large bowl, sift together the flour, sugar, baking soda, salt, and cocoa powder.
- In another bowl, mix the oil, buttermilk, eggs, food coloring, vanilla extract, and vinegar until well combined.
- Gradually add the wet ingredients to the dry ingredients, mixing until just combined.
- Divide the batter evenly among the prepared cake pans.
- Bake for 25-30 minutes or until a toothpick inserted in the center comes out clean.
- Let the cakes cool in the pans for 10 minutes, then transfer to wire racks to cool completely.
- For the frosting, beat the butter until creamy, then gradually add the powdered sugar and vanilla extract, mixing until smooth. Add heavy cream if desired for a lighter texture.
- Once the cakes are completely cool, frost the top of one layer, add the second layer, and frost again. Repeat with the third layer and frost the sides of the cake.
- Decorate as desired and serve.
Notes
- Ensure all ingredients are at room temperature for best results.
- Store leftovers in an airtight container in the refrigerator.
- For a richer flavor, let the cake sit overnight before serving.
- Prep Time: 30 minutes
- Cook Time: 30 minutes
- Category: Dessert
- Method: Baking
- Cuisine: American
Nutrition
- Serving Size: 1 slice
- Calories: 450
- Sugar: 40g
- Sodium: 300mg
- Fat: 20g
- Saturated Fat: 10g
- Unsaturated Fat: 8g
- Trans Fat: 0g
- Carbohydrates: 60g
- Fiber: 2g
- Protein: 4g
- Cholesterol: 50mg
Keywords: Red Velvet Cake, Layer Cake, Vanilla Frosting, Festive Dessert