

Caramel Crunch Layer Cake
Introduction to Caramel Crunch Layer Cake
Welcome to the world of sweet indulgence! If you’re like me, juggling a busy life while trying to whip up something special, the Caramel Crunch Layer Cake is your new best friend. This cake is not just a dessert; it’s a celebration on a plate. Imagine layers of rich caramel and delightful crunch, perfect for impressing your loved ones or simply treating yourself after a long day. With its easy-to-follow steps, this recipe is a quick solution for any occasion, making it a must-have in your baking repertoire!
Why You’ll Love This Caramel Crunch Layer Cake
This Caramel Crunch Layer Cake is a delightful blend of flavors and textures that will make your taste buds dance. It’s incredibly easy to make, even on the busiest of days. The rich caramel flavor paired with the satisfying crunch of toffee bits creates a dessert that feels luxurious without the fuss. Plus, it’s perfect for any celebration, ensuring you’ll be the star of the show at your next gathering!
Ingredients for Caramel Crunch Layer Cake
Gathering the right ingredients is the first step to creating your Caramel Crunch Layer Cake. Here’s what you’ll need:
- All-purpose flour: This is the backbone of your cake, providing structure and stability.
- Granulated sugar: Sweetness is key! It helps create that lovely caramel flavor.
- Unsalted butter: Adds richness and moisture. Make sure it’s softened for easy mixing.
- Milk: This keeps the cake tender and adds a bit of creaminess.
- Large eggs: They bind everything together and help the cake rise.
- Baking powder: This leavening agent gives your cake that perfect lift.
- Vanilla extract: A splash of vanilla enhances the overall flavor, making it more aromatic.
- Caramel sauce: The star of the show! It brings that rich, sweet flavor we all love.
- Crushed toffee bits: These add a delightful crunch and extra sweetness to each bite.
- Heavy cream: Essential for whipping up a fluffy frosting that complements the cake.
- Powdered sugar: This sweetens the whipped cream and helps it hold its shape.
For those looking to switch things up, consider using dark brown sugar instead of granulated sugar for a deeper flavor. And if you’re in a pinch, you can always make your own caramel sauce at home or buy a jar from the store. The exact quantities for each ingredient are listed at the bottom of the article, ready for you to print out and take to the kitchen!
How to Make Caramel Crunch Layer Cake
Now that you have your ingredients ready, let’s dive into the fun part: making your Caramel Crunch Layer Cake! Follow these simple steps, and you’ll have a stunning cake that’s sure to impress.
Step 1: Preheat and Prepare
First things first, preheat your oven to 350°F (175°C). This ensures your cake bakes evenly. While that’s heating up, grease three 9-inch round cake pans with butter or cooking spray. For extra insurance against sticking, you can line the bottoms with parchment paper. Trust me, it makes a world of difference!
Step 2: Cream the Butter and Sugar
In a large mixing bowl, cream together the softened unsalted butter and granulated sugar until it’s light and fluffy. This step is crucial! Creaming incorporates air into the mixture, giving your cake a lovely texture. It should look pale and fluffy, almost like a cloud!
Step 3: Add Eggs and Wet Ingredients
Next, add the eggs one at a time, mixing well after each addition. This helps the batter emulsify, creating a smooth mixture. Then, stir in the milk and vanilla extract. The milk adds moisture, while the vanilla enhances the flavor, making your cake irresistible!
Step 4: Combine Dry Ingredients
In a separate bowl, whisk together the all-purpose flour and baking powder. This step is essential for even distribution of the leavening agent. Gradually add this dry mixture to your wet ingredients, mixing just until combined. Overmixing can lead to a dense cake, and we want it light and fluffy!
Step 5: Bake the Cakes
Now it’s time to divide the batter evenly among the prepared pans. Bake in your preheated oven for 25-30 minutes. To check for doneness, insert a toothpick into the center of the cakes. If it comes out clean, they’re ready to come out!
Step 6: Cool the Cakes
Once baked, let the cakes cool in the pans for about 10 minutes. This allows them to set. Then, carefully transfer them to wire racks to cool completely. Cooling is vital for layering; if they’re warm, the frosting will melt!
Step 7: Layer with Caramel and Toffee
Once your cakes are cool, it’s time to layer! Place one cake layer on a serving plate. Drizzle a generous amount of caramel sauce over it, followed by a sprinkle of crushed toffee bits. Repeat this process with the second layer, then top with the final cake layer.
Step 8: Frost with Whipped Cream
For the frosting, whip the heavy cream with powdered sugar until stiff peaks form. This means it should hold its shape when you lift the whisk. Frost the top and sides of the cake generously. The whipped cream adds a lightness that balances the rich caramel.
Step 9: Final Touches
To make your cake truly shine, drizzle additional caramel sauce over the top and sprinkle more toffee bits for that extra crunch. It’s all about presentation! Your Caramel Crunch Layer Cake is now ready to be the star of the dessert table!
Tips for Success
- Make sure your butter is softened for easy creaming.
- Use room temperature eggs for better incorporation into the batter.
- Don’t overmix the batter; mix just until combined for a light cake.
- Let the cakes cool completely before layering to avoid melting frosting.
- For a fun twist, try adding a pinch of sea salt to the caramel for a salted caramel flavor.
Equipment Needed
- Mixing bowls: A set of various sizes is handy; you can also use any large bowl you have.
- Electric mixer: A stand mixer or hand mixer works best, but a whisk can do in a pinch.
- Measuring cups and spoons: Essential for accuracy; use any standard measuring tools you have.
- Cake pans: Three 9-inch round pans are ideal; you can use two and slice the top layer if needed.
- Wire racks: Great for cooling; if you don’t have them, a plate will work too!
Variations of Caramel Crunch Layer Cake
- Chocolate Caramel Crunch: Add cocoa powder to the batter for a rich chocolate flavor that pairs beautifully with caramel.
- Gluten-Free Option: Substitute all-purpose flour with a gluten-free blend to make this cake suitable for gluten-sensitive friends.
- Nutty Delight: Incorporate chopped pecans or walnuts into the batter for an added crunch and nutty flavor.
- Fruit Layering: Add layers of sliced bananas or strawberries between the cake layers for a fruity twist.
- Vegan Version: Replace eggs with flax eggs and use plant-based milk and butter for a delicious vegan alternative.
Serving Suggestions for Caramel Crunch Layer Cake
- Pair with a scoop of vanilla ice cream for a delightful contrast in temperature and texture.
- Serve alongside fresh berries to add a pop of color and a hint of tartness.
- Drizzle extra caramel sauce on the plate for an elegant presentation.
- Enjoy with a cup of coffee or tea to balance the sweetness.
FAQs about Caramel Crunch Layer Cake
Can I make the Caramel Crunch Layer Cake ahead of time?
Absolutely! This cake can be made a day in advance. In fact, letting it sit overnight allows the flavors to meld beautifully. Just store it in an airtight container in the refrigerator.
What can I use instead of heavy cream for frosting?
If you’re looking for a lighter option, you can use whipped topping or a dairy-free alternative like coconut cream. Just make sure it’s well-chilled for the best results!
How do I store leftovers of the Caramel Crunch Layer Cake?
Store any leftover cake in an airtight container in the refrigerator. It should stay fresh for about 3-4 days, but I doubt it will last that long!
Can I freeze the Caramel Crunch Layer Cake?
Yes, you can freeze the cake! Wrap it tightly in plastic wrap and then in aluminum foil. It can be frozen for up to three months. Just thaw it in the fridge before serving.
What can I substitute for toffee bits?
If you can’t find toffee bits, chopped chocolate-covered toffee bars or even crushed caramel candies work well. They’ll still give you that delightful crunch!
Final Thoughts
Creating this Caramel Crunch Layer Cake is more than just baking; it’s about crafting sweet memories. Each layer tells a story of love, laughter, and celebration. The rich caramel and crunchy toffee bits come together to create a dessert that’s not only delicious but also visually stunning. Whether you’re celebrating a special occasion or simply treating yourself, this cake brings joy to every bite. So, roll up your sleeves, gather your loved ones, and dive into this delightful baking adventure. Trust me, the smiles you’ll receive will be worth every moment spent in the kitchen!
Print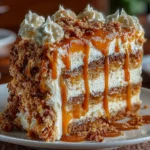
Caramel Crunch Layer Cake: Indulge in Sweet Bliss!
- Total Time: 1 hour
- Yield: 12 servings 1x
- Diet: Vegetarian
Description
A decadent Caramel Crunch Layer Cake that combines rich caramel flavors with a delightful crunch, perfect for any celebration.
Ingredients
- 2 cups all-purpose flour
- 1 ½ cups granulated sugar
- ½ cup unsalted butter, softened
- 1 cup milk
- 3 large eggs
- 1 tablespoon baking powder
- 1 teaspoon vanilla extract
- 1 cup caramel sauce
- 1 cup crushed toffee bits
- 1 cup heavy cream
- ¼ cup powdered sugar
Instructions
- Preheat the oven to 350°F (175°C) and grease three 9-inch round cake pans.
- In a large bowl, cream together the butter and sugar until light and fluffy.
- Add the eggs one at a time, mixing well after each addition.
- Stir in the milk and vanilla extract.
- In a separate bowl, combine the flour and baking powder, then gradually add to the wet mixture.
- Divide the batter evenly among the prepared pans and bake for 25-30 minutes or until a toothpick comes out clean.
- Let the cakes cool in the pans for 10 minutes, then transfer to wire racks to cool completely.
- Once cooled, layer the cakes with caramel sauce and crushed toffee bits in between each layer.
- Whip the heavy cream with powdered sugar until stiff peaks form and frost the top and sides of the cake.
- Drizzle additional caramel sauce over the top and sprinkle with more toffee bits before serving.
Notes
- For a richer flavor, use dark brown sugar instead of granulated sugar.
- Store leftovers in an airtight container in the refrigerator.
- This cake can be made a day in advance for better flavor development.
- Prep Time: 30 minutes
- Cook Time: 30 minutes
- Category: Dessert
- Method: Baking
- Cuisine: American
Nutrition
- Serving Size: 1 slice
- Calories: 450
- Sugar: 35g
- Sodium: 200mg
- Fat: 22g
- Saturated Fat: 12g
- Unsaturated Fat: 8g
- Trans Fat: 0g
- Carbohydrates: 55g
- Fiber: 1g
- Protein: 6g
- Cholesterol: 80mg
Keywords: Caramel Crunch Layer Cake, dessert, cake recipe, caramel cake