
Reese’s Peanut Butter Earthquake Cake
Introduction to Reese’s Peanut Butter Earthquake Cake
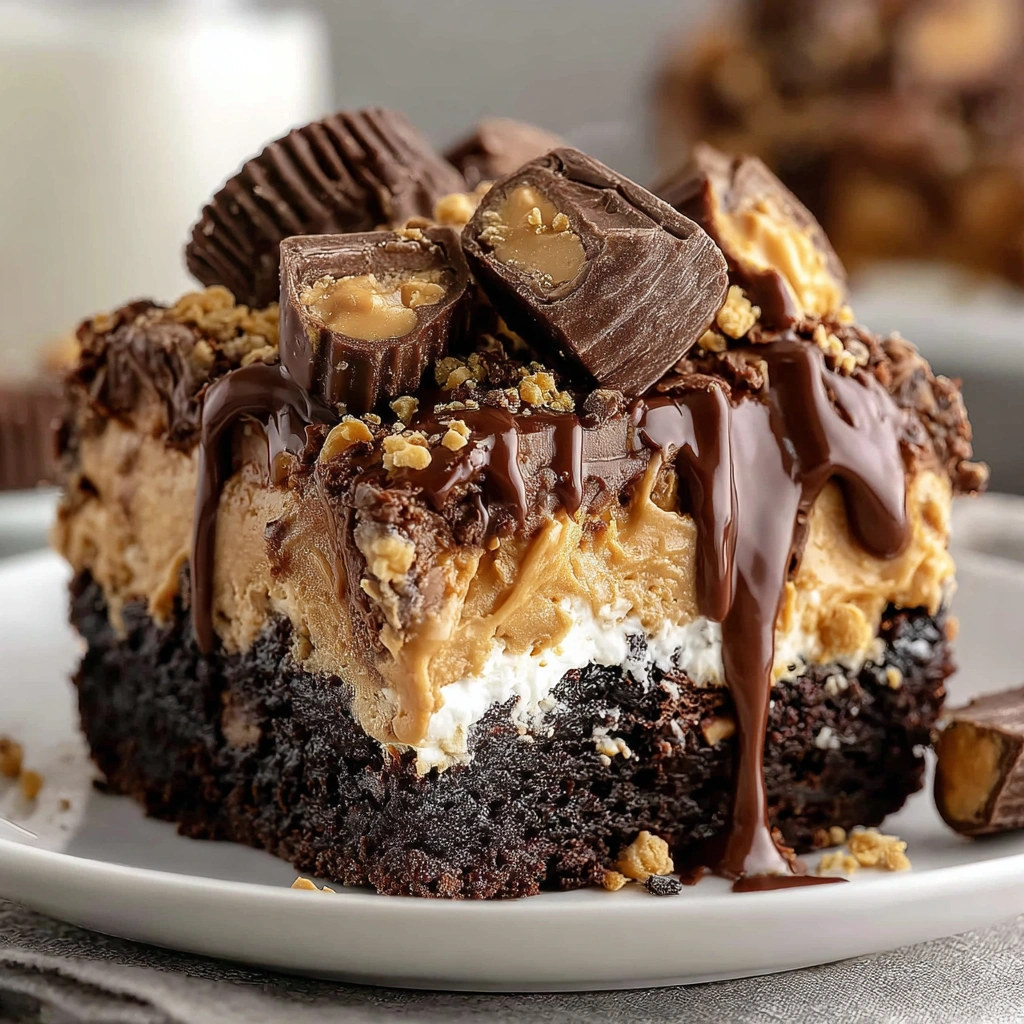
As a busy mom, I know how precious time can be, especially when it comes to whipping up something delicious. That’s why I’m excited to share my favorite dessert: Reese’s Peanut Butter Earthquake Cake. This cake is not just a treat; it’s a delightful explosion of flavors that will impress your family and friends. Imagine rich chocolate cake, creamy peanut butter, and gooey goodness all in one bite! It’s the perfect solution for a quick dessert or a special occasion, making it a must-try for anyone who loves a sweet indulgence.
Why You’ll Love This Reese’s Peanut Butter Earthquake Cake
This Reese’s Peanut Butter Earthquake Cake is a game-changer for busy days. It’s incredibly easy to make, requiring just a few simple steps. The taste? Oh, it’s a heavenly blend of chocolate and peanut butter that will have everyone asking for seconds. Plus, it’s a crowd-pleaser, perfect for family gatherings or last-minute get-togethers. You’ll love how quickly it comes together, leaving you more time to enjoy the sweet moments with your loved ones.
Ingredients for Reese’s Peanut Butter Earthquake Cake
Gathering the right ingredients is the first step to creating this delightful Reese’s Peanut Butter Earthquake Cake. Here’s what you’ll need:
- Chocolate cake mix: This is the base of our cake, providing that rich, chocolatey flavor. You can opt for dark chocolate mix for an even deeper taste.
- Water: It helps to bring the cake mix together, ensuring a moist texture.
- Vegetable oil: This adds moisture and richness to the cake, making it tender and delicious.
- Large eggs: Eggs act as a binding agent, giving the cake structure and helping it rise.
- Creamy peanut butter: The star of the show! It adds that irresistible peanut flavor and creamy texture.
- Powdered sugar: This sweetens the peanut butter mixture, creating a delightful contrast to the chocolate cake.
- Chocolate chips: These little morsels melt into the cake, adding pockets of gooey chocolate goodness.
- Reese’s peanut butter cups: Chopped and sprinkled on top, they provide a crunchy, sweet finish that’s simply irresistible.
For exact measurements, check the bottom of the article where you can find everything listed for easy printing. Feel free to get creative with your ingredients! You can swap out the chocolate cake mix for a gluten-free version or use natural peanut butter for a healthier twist. The possibilities are endless!
How to Make Reese’s Peanut Butter Earthquake Cake
Step 1: Preheat and Prepare
First things first, let’s get that oven preheating to 350°F (175°C). While it warms up, grab a 9×13 inch baking pan and grease it well. I like to use a bit of vegetable oil or cooking spray to ensure the cake slides out easily later. This step is crucial for a perfect bake, so don’t skip it!
Step 2: Mix the Cake Batter
In a large mixing bowl, combine the chocolate cake mix, water, vegetable oil, and eggs. Use a whisk or an electric mixer to blend everything until it’s smooth and well combined. The batter should be thick and luscious, with no lumps in sight. This chocolatey goodness is the foundation of our Reese’s Peanut Butter Earthquake Cake, so mix it well!
Step 3: Prepare the Peanut Butter Mixture
Now, let’s whip up that creamy peanut butter mixture! In a separate bowl, mix the creamy peanut butter and powdered sugar together until it’s smooth and fluffy. This mixture will create those delightful pockets of peanut butter flavor in the cake. Trust me, it’s worth the extra bowl!
Step 4: Layer the Cake
Time to assemble our masterpiece! Pour half of the chocolate cake batter into the prepared pan, spreading it evenly. Next, drop spoonfuls of the peanut butter mixture over the chocolate batter. Don’t worry about being perfect; it’ll all come together in the oven. Finally, pour the remaining chocolate batter on top, covering the peanut butter layer completely. It’s like a delicious surprise waiting to happen!
Step 5: Add Toppings
Let’s make this cake even more irresistible! Sprinkle chocolate chips and chopped Reese’s peanut butter cups generously on top of the batter. These toppings will melt and create a gooey, decadent layer that’s simply heavenly. You can never have too much chocolate or peanut butter, right?
Step 6: Bake the Cake
Now, it’s time to bake! Place the pan in the preheated oven and let it bake for 30-35 minutes. Keep an eye on it, and check for doneness by inserting a toothpick in the center. If it comes out clean or with a few moist crumbs, it’s ready! The aroma wafting through your kitchen will be absolutely divine.
Step 7: Cool and Serve
Once baked, remove the cake from the oven and let it cool in the pan for about 10-15 minutes. This cooling time helps the cake set up nicely. After that, you can slice it into squares and serve it warm or at room temperature. Enjoy every gooey, chocolatey bite!
Tips for Success
- Make sure your ingredients are at room temperature for better mixing.
- Don’t overmix the cake batter; a few lumps are okay!
- For extra flavor, add a splash of vanilla extract to the batter.
- Use a toothpick to check for doneness; it should come out clean.
- Let the cake cool completely before slicing for cleaner pieces.
Equipment Needed
- 9×13 inch baking pan: A standard size for this cake. You can use a glass or metal pan.
- Mixing bowls: A couple of medium-sized bowls will do. You can also use a large measuring cup.
- Whisk or electric mixer: For mixing the batter smoothly. A whisk works just fine if you prefer a workout!
- Spatula: Essential for spreading the batter evenly. A silicone spatula is great for scraping.
Variations
- Gluten-Free Option: Substitute the chocolate cake mix with a gluten-free blend to make this cake suitable for those with gluten sensitivities.
- Nut-Free Version: Use sun butter or a similar nut-free spread instead of peanut butter for a delicious alternative.
- Healthier Twist: Swap out half of the vegetable oil for unsweetened applesauce to reduce fat while keeping moisture.
- Extra Chocolate: For chocolate lovers, add a layer of chocolate ganache on top after baking for an indulgent finish.
- Fruit Additions: Toss in some chopped bananas or strawberries into the batter for a fruity surprise.
Serving Suggestions
- Pair with a scoop of vanilla ice cream for a delightful contrast to the warm cake.
- Serve with a drizzle of chocolate syrup for an extra indulgent touch.
- Top with whipped cream and a sprinkle of crushed Reese’s cups for a beautiful presentation.
- Enjoy with a cup of coffee or a glass of cold milk to balance the sweetness.
FAQs about Reese’s Peanut Butter Earthquake Cake
Can I make Reese’s Peanut Butter Earthquake Cake ahead of time?
Absolutely! This cake can be made a day in advance. Just store it in an airtight container at room temperature. The flavors will meld beautifully, making it even more delicious!
What can I substitute for peanut butter?
If you need a nut-free option, sun butter works wonderfully. You can also use almond butter or cashew butter for a different flavor twist. Just ensure your guests don’t have allergies!
How do I store leftovers?
Leftovers can be stored in an airtight container at room temperature for up to three days. If you want to keep it longer, refrigerate it for up to a week. Just warm it up before serving for that fresh-baked taste!
Can I freeze this cake?
Yes, you can freeze Reese’s Peanut Butter Earthquake Cake! Wrap it tightly in plastic wrap and then in aluminum foil. It can be frozen for up to three months. Thaw it in the fridge overnight before serving.
What’s the best way to serve this cake?
This cake is delightful on its own, but I love serving it warm with a scoop of vanilla ice cream. The combination of warm cake and cold ice cream is simply heavenly!
Final Thoughts
Making Reese’s Peanut Butter Earthquake Cake is more than just baking; it’s about creating sweet memories with loved ones. The joy of watching their faces light up with each gooey, chocolatey bite is priceless. This cake is a delightful treat that brings everyone together, whether it’s a family gathering or a cozy night in. Plus, it’s so easy to whip up, even on the busiest days! So, roll up your sleeves, embrace the mess, and enjoy the delicious chaos that comes with this indulgent dessert. Trust me, it’s worth every crumb!
Print
Reese’s Peanut Butter Earthquake Cake: A Must-Try Delight!
- Total Time: 55 minutes
- Yield: 12 servings 1x
- Diet: Vegetarian
Description
Reese’s Peanut Butter Earthquake Cake is a decadent dessert that combines rich chocolate cake with creamy peanut butter and a gooey filling, topped with Reese’s peanut butter cups for an irresistible treat.
Ingredients
- 1 box chocolate cake mix
- 1 cup water
- 1/2 cup vegetable oil
- 3 large eggs
- 1 cup creamy peanut butter
- 1 cup powdered sugar
- 1 cup chocolate chips
- 1 cup Reese’s peanut butter cups, chopped
Instructions
- Preheat the oven to 350°F (175°C) and grease a 9×13 inch baking pan.
- In a large bowl, combine the chocolate cake mix, water, vegetable oil, and eggs. Mix until well combined.
- In another bowl, mix the peanut butter and powdered sugar until smooth.
- Pour half of the chocolate cake batter into the prepared pan.
- Drop spoonfuls of the peanut butter mixture over the cake batter.
- Pour the remaining chocolate cake batter on top.
- Sprinkle chocolate chips and chopped Reese’s peanut butter cups on top.
- Bake for 30-35 minutes or until a toothpick inserted in the center comes out clean.
- Let cool before serving.
Notes
- For a richer flavor, use dark chocolate cake mix.
- Store leftovers in an airtight container at room temperature for up to 3 days.
- This cake can be served warm or at room temperature.
- Prep Time: 20 minutes
- Cook Time: 35 minutes
- Category: Dessert
- Method: Baking
- Cuisine: American
Nutrition
- Serving Size: 1 slice
- Calories: 350
- Sugar: 25g
- Sodium: 200mg
- Fat: 18g
- Saturated Fat: 6g
- Unsaturated Fat: 10g
- Trans Fat: 0g
- Carbohydrates: 40g
- Fiber: 2g
- Protein: 6g
- Cholesterol: 50mg
Keywords: Reese’s Peanut Butter Earthquake Cake, chocolate cake, peanut butter dessert, easy cake recipe