
Maple Donut Bars: Indulge in a Deliciously Soft Treat!
Introduction to Maple Donut Bars
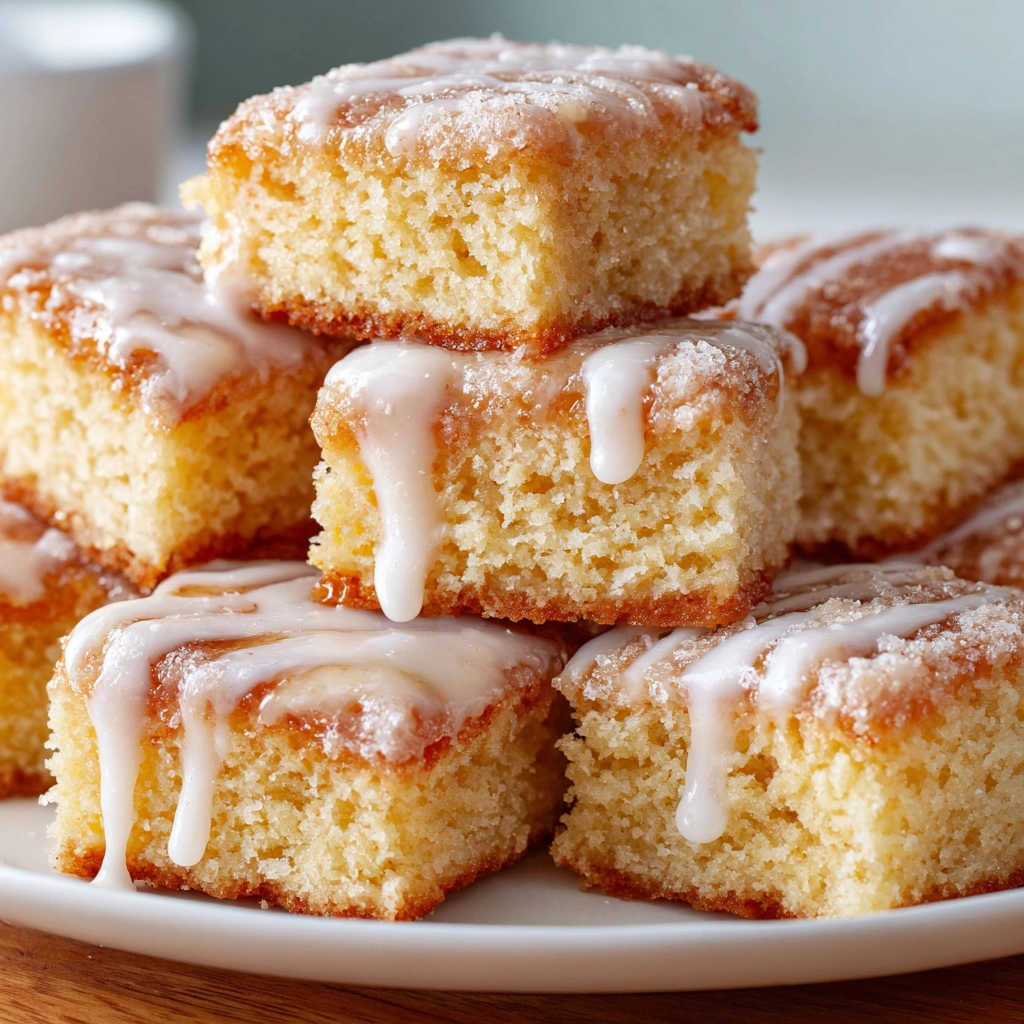
As a busy mom, I know how precious time can be, especially in the mornings. That’s why I absolutely adore these Maple Donut Bars! They’re not just a treat; they’re a delightful way to start your day or to impress your loved ones at brunch. With their soft, cake-like texture and the sweet embrace of maple syrup, these bars are a quick solution for those hectic mornings. Plus, they’re so easy to whip up that you’ll feel like a culinary superstar without spending hours in the kitchen. Trust me, your family will be begging for seconds!
Why You’ll Love This Maple Donut Bars
These Maple Donut Bars are a game-changer for busy days! They come together in just 45 minutes, making them perfect for breakfast or a sweet snack. The rich flavor of maple syrup dances on your taste buds, while the soft, cake-like texture melts in your mouth. Plus, they’re versatile enough to serve at any gathering, ensuring you’ll always be the star of the show. Who wouldn’t love that?
Ingredients for Maple Donut Bars
Gathering the right ingredients is the first step to creating these delightful Maple Donut Bars. Here’s what you’ll need:
- All-purpose flour: This forms the base of your bars, giving them that lovely cake-like texture.
- Granulated sugar: Sweetness is key! It helps balance the flavors and adds to the soft texture.
- Unsalted butter: Softened butter creates a rich flavor and helps achieve that fluffy consistency when creamed with sugar.
- Milk: This adds moisture and contributes to the tender crumb of the bars. You can use whole or low-fat milk based on your preference.
- Large eggs: Eggs act as a binding agent, helping the bars rise and hold their shape.
- Maple syrup: The star of the show! It infuses the bars with a warm, sweet flavor. For a deeper taste, consider using dark maple syrup.
- Baking powder: This leavening agent ensures your bars rise beautifully, giving them that light and airy texture.
- Salt: Just a pinch enhances the overall flavor, balancing the sweetness of the sugar and syrup.
- Vanilla extract: A splash of vanilla adds depth and warmth to the flavor profile.
- Powdered sugar: This is for the glaze, providing that sweet finishing touch that makes these bars irresistible.
- Additional maple syrup: Used in the glaze, it ties everything together with a sweet, glossy finish.
For exact measurements, check the bottom of the article where you can find everything listed for easy printing. Happy baking!
How to Make Maple Donut Bars
Step 1: Preheat and Prepare
First things first, preheat your oven to 350°F (175°C). While it warms up, grab a baking pan and grease it well. This step is crucial to ensure your Maple Donut Bars don’t stick. Trust me, you want them to slide right out!
Step 2: Cream Butter and Sugar
In a large mixing bowl, combine softened butter and granulated sugar. Using a hand mixer or a whisk, cream them together until the mixture is light and fluffy. This process adds air, making your bars soft and tender. It’s like giving them a little love!
Step 3: Mix Wet Ingredients
Now, it’s time to add the eggs, milk, and maple syrup to your creamed mixture. Mix everything together until well combined. The maple syrup will start to shine through, filling your kitchen with a sweet aroma. It’s a delightful moment!
Step 4: Combine Dry Ingredients
In a separate bowl, whisk together the all-purpose flour, baking powder, and salt. This step ensures that your leavening agent is evenly distributed. It’s like prepping the stage for your bars to rise beautifully in the oven!
Step 5: Mix Wet and Dry Ingredients
Gradually add the dry ingredients to the wet mixture. Stir gently until just combined. Be careful not to overmix; we want those bars to stay soft and fluffy. It’s all about balance, just like life!
Step 6: Bake the Bars
Pour the batter into your prepared baking pan, smoothing the top with a spatula. Pop it into the oven and bake for 25-30 minutes. You’ll know they’re ready when a toothpick inserted in the center comes out clean. The anticipation is half the fun!
Step 7: Cool and Glaze
Once baked, let the bars cool completely in the pan. Meanwhile, prepare the glaze by mixing powdered sugar and maple syrup until smooth. Drizzle this sweet goodness over the cooled bars. It’s the cherry on top of your Maple Donut Bars masterpiece!
Tips for Success
- Make sure your butter is softened for easy creaming; it should be at room temperature.
- Don’t overmix the batter; a few lumps are okay for soft, tender bars.
- Use a toothpick to check for doneness; it should come out clean, not wet.
- Let the bars cool completely before glazing for a perfect finish.
- Store leftovers in an airtight container to keep them fresh and delicious!
Equipment Needed
- Baking pan: A 9×13 inch pan works best, but you can use any similar-sized dish.
- Mixing bowls: Have a large bowl for wet ingredients and a smaller one for dry.
- Whisk or hand mixer: Either will do for creaming butter and sugar.
- Spatula: Perfect for smoothing the batter and drizzling glaze.
- Toothpick: Essential for checking if your bars are baked to perfection!
Variations
- Chocolate Chip Maple Donut Bars: Add a cup of chocolate chips to the batter for a delightful twist that chocolate lovers will adore.
- Nutty Maple Bars: Stir in 1/2 cup of chopped walnuts or pecans for a crunchy texture that complements the soft bars beautifully.
- Gluten-Free Option: Substitute all-purpose flour with a gluten-free flour blend to make these bars suitable for gluten-sensitive friends.
- Maple Bacon Bars: Top the glaze with crispy, crumbled bacon for a sweet and savory combination that’s sure to impress!
- Spiced Maple Bars: Add a teaspoon of cinnamon or nutmeg to the dry ingredients for a warm, spiced flavor that’s perfect for fall.
Serving Suggestions
- Pair your Maple Donut Bars with a hot cup of coffee or tea for a cozy breakfast experience.
- Serve with fresh fruit, like sliced strawberries or bananas, to add a refreshing touch.
- For a brunch gathering, arrange the bars on a beautiful platter, drizzling extra glaze on top for a stunning presentation.
- Consider adding a dollop of whipped cream or a scoop of vanilla ice cream for an indulgent dessert.
FAQs about Maple Donut Bars
Can I make Maple Donut Bars ahead of time?
Absolutely! You can bake these bars a day in advance. Just store them in an airtight container at room temperature. They’ll still taste delicious the next day!
How do I store leftover Maple Donut Bars?
To keep your bars fresh, store them in an airtight container at room temperature for up to three days. If you want to keep them longer, they can be frozen for up to two months. Just thaw before serving!
Can I use a different type of syrup?
While maple syrup is the star of this recipe, you can experiment with other syrups like agave or honey. Just keep in mind that the flavor will change slightly, but it can still be delicious!
What can I serve with Maple Donut Bars?
These bars pair wonderfully with coffee or tea. You can also serve them with fresh fruit or a scoop of ice cream for a delightful dessert experience!
Can I make these bars gluten-free?
Yes! Simply substitute the all-purpose flour with a gluten-free flour blend. This way, everyone can enjoy the deliciousness of Maple Donut Bars!
Final Thoughts
Making Maple Donut Bars is more than just baking; it’s about creating sweet moments with your loved ones. The joy of pulling these soft, cake-like bars from the oven fills your kitchen with warmth and happiness. Each bite is a delightful reminder of cozy mornings and shared laughter. Whether you enjoy them for breakfast or as a dessert, these bars are sure to bring smiles all around. So, roll up your sleeves, embrace the sweet chaos of the kitchen, and let the magic of maple syrup transform your day into something special. Happy baking!
Print
Maple Donut Bars: Indulge in a Deliciously Soft Treat!
- Total Time: 45 minutes
- Yield: 12 bars 1x
- Diet: Vegetarian
Description
Maple Donut Bars are a deliciously soft treat that combines the flavors of maple syrup and a cake-like texture, perfect for breakfast or dessert.
Ingredients
- 2 cups all-purpose flour
- 1 cup granulated sugar
- 1/2 cup unsalted butter, softened
- 1 cup milk
- 2 large eggs
- 1/4 cup maple syrup
- 2 teaspoons baking powder
- 1/2 teaspoon salt
- 1 teaspoon vanilla extract
- 1 cup powdered sugar (for glaze)
- 2 tablespoons maple syrup (for glaze)
Instructions
- Preheat the oven to 350°F (175°C) and grease a baking pan.
- In a large bowl, cream together the butter and sugar until light and fluffy.
- Add the eggs, milk, and maple syrup, mixing until well combined.
- In another bowl, whisk together the flour, baking powder, and salt.
- Gradually add the dry ingredients to the wet ingredients, mixing until just combined.
- Pour the batter into the prepared baking pan and smooth the top.
- Bake for 25-30 minutes or until a toothpick inserted in the center comes out clean.
- Let the bars cool completely before glazing.
- For the glaze, mix powdered sugar and maple syrup until smooth, then drizzle over the cooled bars.
Notes
- Store leftovers in an airtight container at room temperature for up to 3 days.
- For a richer flavor, use dark maple syrup.
- These bars can be frozen for up to 2 months; thaw before serving.
- Prep Time: 15 minutes
- Cook Time: 30 minutes
- Category: Dessert
- Method: Baking
- Cuisine: American
Nutrition
- Serving Size: 1 bar
- Calories: 250
- Sugar: 20g
- Sodium: 150mg
- Fat: 10g
- Saturated Fat: 6g
- Unsaturated Fat: 3g
- Trans Fat: 0g
- Carbohydrates: 35g
- Fiber: 1g
- Protein: 3g
- Cholesterol: 40mg
Keywords: Maple Donut Bars, Maple Bars, Dessert, Breakfast Treat