
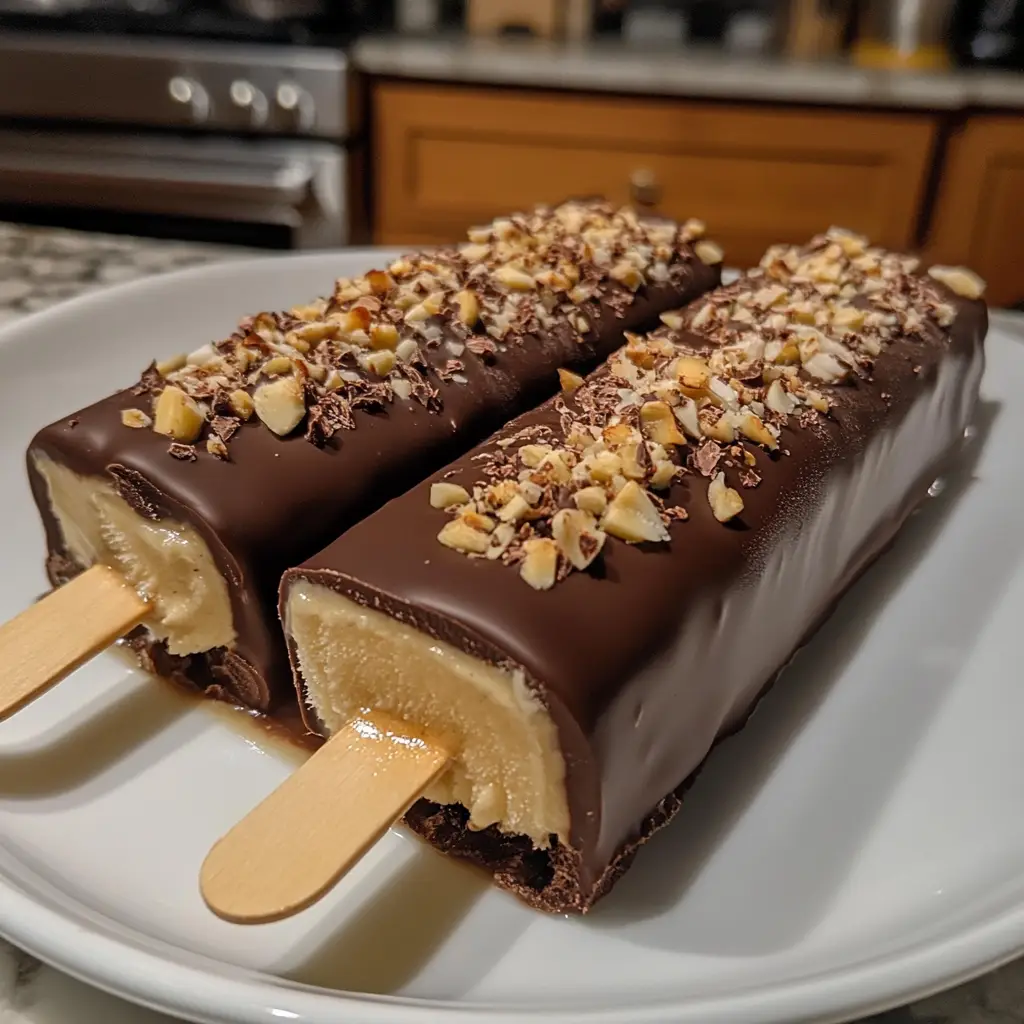
Chocolate Covered Banana Ice Cream Bars you can’t resist!
Introduction to Chocolate Covered Banana Ice Cream Bars
As a busy mom, I know how challenging it can be to whip up a sweet treat that everyone will love. That’s why I adore these Chocolate Covered Banana Ice Cream Bars! They’re not just delicious; they’re also incredibly easy to make. With just a few simple ingredients, you can create a delightful dessert that will impress your family and friends. Whether it’s a hot summer day or a cozy movie night, these bars are the perfect solution for satisfying those sweet cravings without spending hours in the kitchen.
Why You’ll Love This Chocolate Covered Banana Ice Cream Bars
These Chocolate Covered Banana Ice Cream Bars are a dream come true for busy families! They come together in just a few simple steps, making them a quick and satisfying treat. The creamy vanilla ice cream paired with the rich chocolate coating creates a flavor explosion that’s hard to resist. Plus, they’re a healthier alternative to store-bought desserts, so you can indulge without the guilt!
Ingredients for Chocolate Covered Banana Ice Cream Bars
Gathering the right ingredients is the first step to creating these delightful Chocolate Covered Banana Ice Cream Bars. Here’s what you’ll need:
- Ripe Bananas: The star of the show! Ripe bananas are sweeter and creamier, making them perfect for this recipe.
- Vanilla Ice Cream: This adds a rich, creamy base. You can use any brand you love, or even make your own if you’re feeling adventurous!
- Dark Chocolate Chips: For that luscious chocolate coating. Dark chocolate gives a nice balance of sweetness and richness. Feel free to swap for milk or white chocolate if you prefer.
- Coconut Oil: This helps the chocolate melt smoothly and gives it a nice sheen. It’s a secret ingredient that makes a big difference!
- Sprinkles (optional): A fun way to jazz up your bars! Use colorful sprinkles or crushed nuts for added texture and flair.
For exact measurements, check the bottom of the article where you can find everything listed for easy printing. Happy cooking!
How to Make Chocolate Covered Banana Ice Cream Bars
Now that you have your ingredients ready, let’s dive into the fun part—making these Chocolate Covered Banana Ice Cream Bars! Follow these simple steps, and you’ll have a delicious treat in no time.
Step 1: Prepare the Bananas
Start by peeling the ripe bananas. The riper they are, the sweeter and creamier your bars will taste. Cut each banana in half, creating two equal pieces. This is where the magic begins, as the bananas will become the perfect base for your ice cream bars!
Step 2: Insert Popsicle Sticks
Next, take a popsicle stick and gently insert it into the cut end of each banana half. Make sure it goes in about halfway to ensure stability. This step is crucial because it allows you to easily dip and enjoy your bars later without any mess!
Step 3: Freeze the Bananas
Place the banana halves on a baking sheet lined with parchment paper and pop them in the freezer. Let them freeze for at least 2 hours. This step is essential for achieving that perfect texture. Frozen bananas will hold up better when dipped in chocolate, giving you a delightful crunch!
Step 4: Melt the Chocolate
While the bananas are freezing, it’s time to melt the chocolate. In a microwave-safe bowl, combine the dark chocolate chips and coconut oil. Heat in 30-second intervals, stirring in between, until smooth. The coconut oil helps the chocolate melt evenly and gives it a glossy finish. Trust me, this little addition makes a world of difference!
Step 5: Dip the Bananas
Once the bananas are frozen solid, it’s time to dip! Hold a banana half by the stick and dip it into the melted chocolate. Make sure to coat it evenly, allowing any excess chocolate to drip off. This is where you can get creative—don’t be shy about getting that chocolate all over!
Step 6: Add Toppings
If you want to take your bars to the next level, now’s the time to add toppings! While the chocolate is still wet, sprinkle on some colorful sprinkles, crushed nuts, or even shredded coconut. These toppings not only add flavor but also make your bars look extra special!
Step 7: Final Freeze
After dipping and decorating, place the chocolate-covered bananas back on the parchment-lined baking sheet. Freeze them again for at least 30 minutes. This final freeze is crucial for setting the chocolate coating, ensuring that each bite is a delightful combination of creamy banana and rich chocolate.
Tips for Success
- Use ripe bananas for the best flavor and creaminess.
- Don’t rush the freezing process; it’s key for texture.
- Experiment with different chocolate types for unique flavors.
- Keep the melted chocolate warm while dipping to avoid hardening.
- Have fun with toppings—let your creativity shine!
Equipment Needed
- Baking Sheet: A standard baking sheet works great. You can also use a cutting board if that’s what you have on hand.
- Parchment Paper: This keeps the bars from sticking. If you don’t have any, a silicone mat is a good alternative.
- Microwave-Safe Bowl: Any bowl that can handle heat will do. Just make sure it’s big enough for melting chocolate!
- Popsicle Sticks: If you’re out, wooden skewers or even sturdy straws can work in a pinch.
Variations of Chocolate Covered Banana Ice Cream Bars
- Nut Butter Swirl: Before freezing, spread a layer of your favorite nut butter on the banana halves for an extra creamy texture and nutty flavor.
- Fruit Dips: Try dipping the bananas in melted white chocolate or yogurt for a different taste experience. You can even drizzle with caramel for a sweet twist!
- Vegan Option: Use dairy-free ice cream and dark chocolate chips to make these bars vegan-friendly. They’ll still be just as delicious!
- Spiced Chocolate: Add a pinch of cinnamon or cayenne pepper to the melted chocolate for a spicy kick that pairs beautifully with the sweetness of the bananas.
- Granola Coating: Instead of sprinkles, roll the dipped bananas in granola for a crunchy texture and added fiber.
Serving Suggestions for Chocolate Covered Banana Ice Cream Bars
- Pair these bars with a scoop of your favorite ice cream for an indulgent dessert.
- Serve alongside fresh fruit like strawberries or raspberries for a refreshing contrast.
- Drizzle with chocolate or caramel sauce for an extra touch of sweetness.
- Present on a colorful platter to impress your guests at gatherings.
- Enjoy with a glass of cold milk or a warm cup of coffee for a delightful treat!
FAQs about Chocolate Covered Banana Ice Cream Bars
As you embark on your journey to make these delightful Chocolate Covered Banana Ice Cream Bars, you might have a few questions. Here are some common queries I’ve encountered, along with helpful answers!
Can I use other fruits instead of bananas?
Absolutely! While bananas are the star of this recipe, you can experiment with other fruits like strawberries or peaches. Just make sure they’re firm enough to hold up during the freezing and dipping process.
How long do these bars last in the freezer?
These bars can last up to two weeks in the freezer if stored in an airtight container. However, I doubt they’ll last that long—they’re just too delicious!
Can I make these bars dairy-free?
Yes! Simply use dairy-free ice cream and dark chocolate chips. This way, you can enjoy a tasty treat that fits your dietary needs without sacrificing flavor.
What can I do if the chocolate hardens too quickly?
If your chocolate hardens before you finish dipping, just pop it back in the microwave for a few seconds. Stir in a bit more coconut oil to help it melt smoothly again.
Can I make these bars ahead of time?
Definitely! These Chocolate Covered Banana Ice Cream Bars are perfect for meal prep. Make them a day or two in advance, and you’ll have a sweet treat ready whenever the craving strikes!
Final Thoughts
Creating these Chocolate Covered Banana Ice Cream Bars is more than just making a dessert; it’s about sharing joy with loved ones. Each bite is a delightful blend of creamy banana and rich chocolate that brings smiles all around. I love how simple and quick this recipe is, making it perfect for busy days. Plus, it’s a fun activity to involve the kids in the kitchen! So, whether you’re treating yourself or hosting a gathering, these bars are sure to impress. Enjoy the sweet moments and the laughter that comes with every delicious bite!
PrintChocolate Covered Banana Ice Cream Bars you can’t resist!
- Total Time: 2 hours 30 minutes
- Yield: 8 bars 1x
- Diet: Vegetarian
Description
Delicious and creamy chocolate covered banana ice cream bars that are easy to make and perfect for a sweet treat.
Ingredients
- 4 ripe bananas
- 2 cups of vanilla ice cream
- 1 cup of dark chocolate chips
- 1 tablespoon of coconut oil
- Sprinkles (optional)
Instructions
- Peel the bananas and cut them in half.
- Insert a popsicle stick into each banana half.
- Freeze the banana halves for at least 2 hours.
- In a microwave-safe bowl, melt the dark chocolate chips and coconut oil together until smooth.
- Dip each frozen banana half into the melted chocolate, ensuring it is fully coated.
- Sprinkle with toppings if desired.
- Place the chocolate-covered bananas on a parchment-lined baking sheet.
- Freeze again for at least 30 minutes before serving.
Notes
- Make sure the bananas are ripe for the best flavor.
- You can use milk chocolate or white chocolate instead of dark chocolate.
- Store any leftovers in an airtight container in the freezer.
- Prep Time: 10 minutes
- Cook Time: 0 minutes
- Category: Dessert
- Method: Freezing
- Cuisine: American
Nutrition
- Serving Size: 1 bar
- Calories: 150
- Sugar: 10g
- Sodium: 30mg
- Fat: 7g
- Saturated Fat: 4g
- Unsaturated Fat: 2g
- Trans Fat: 0g
- Carbohydrates: 20g
- Fiber: 2g
- Protein: 2g
- Cholesterol: 0mg
Keywords: Chocolate Covered Banana Ice Cream Bars, Banana Ice Cream, Chocolate Dessert