
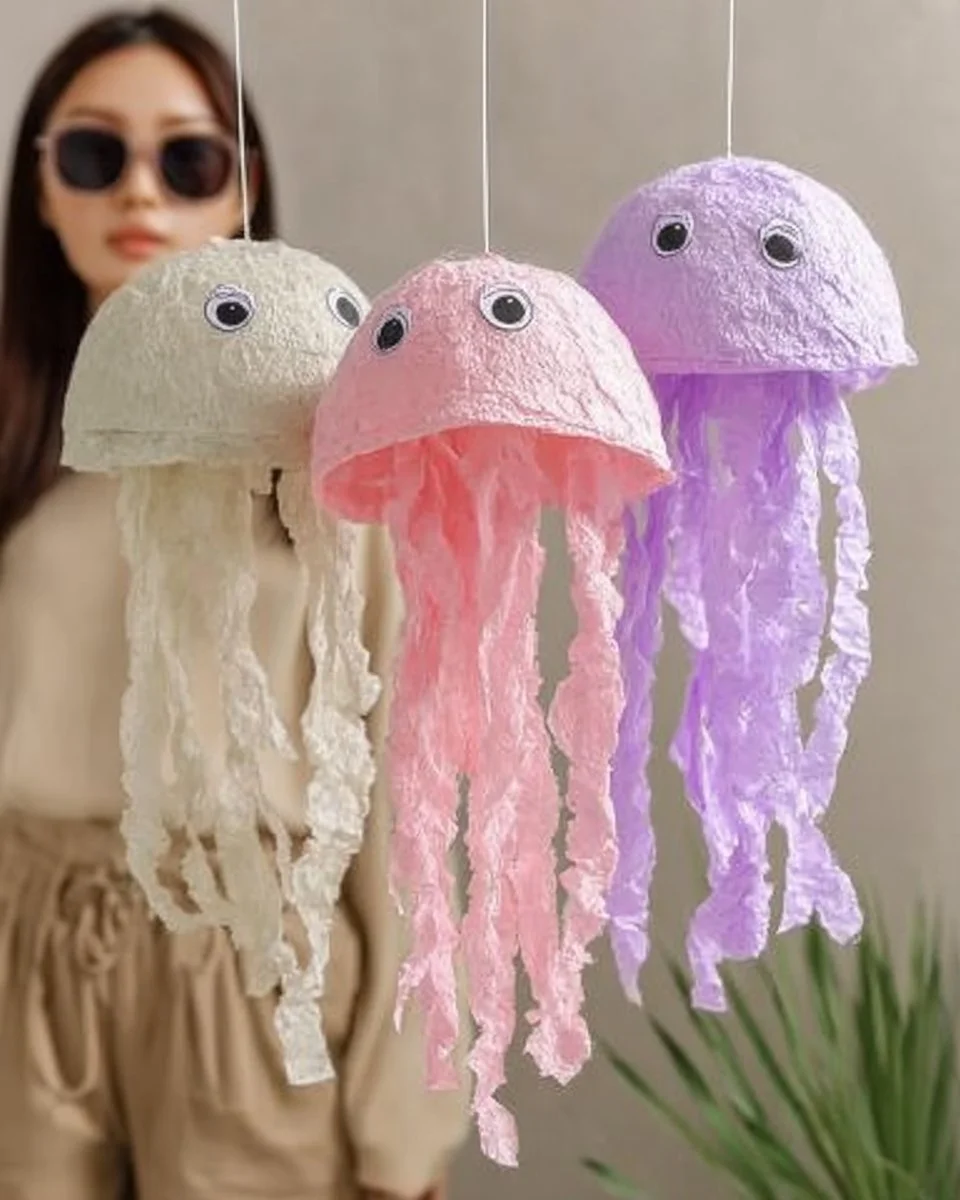
Craft Beautiful Jellyfish from Recycled Egg Cartons – DIY Fun for All Ages
Transform Old Egg Cartons into Vibrant Jellyfish: A Creative Journey
As summer rolls in and the world outside bursts into that vibrant tapestry of colors, one cannot help but feel that familiar stir of creativity bubbling up. The evenings are longer, the sunlight dances through fluttering leaves, and there’s a palpable sense of joy in exploring new possibilities. Remember those afternoons spent crafting with your kids, or even indulging in a DIY project just for yourself? Today, let’s dive into a delightful craft that combines creativity, sustainability, and a bit of whimsy: transforming old egg cartons into colorful jellyfish!
This simple yet engaging project is perfect for both adults and children, offering a chance to bond over the beauty of art while also promoting recycling. With just a few materials and a sprinkle of imagination, you can create a charming display of jellyfish that will add a splash of color and fun to any space.
Why People Love This Idea
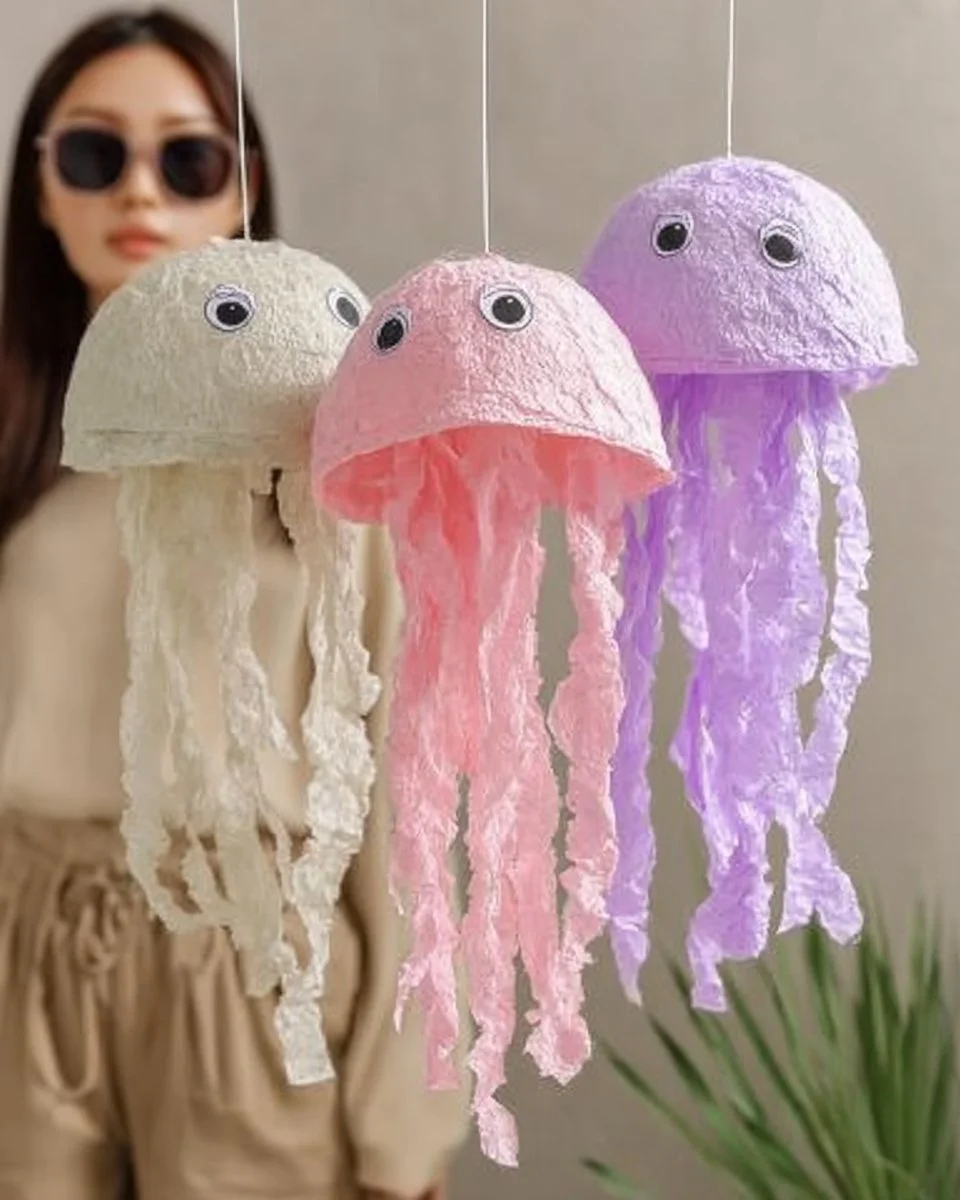
There’s something magical about transforming everyday items into pieces of art, especially when you can do it together with loved ones. The joy of creation is coupled with the satisfaction of reusing materials. Each jellyfish becomes a unique piece, reflecting your personality and flair. They can be hung from the ceiling to create an ocean-like environment or used as decorations for a party underwater-themed.
In homes all over, parents are discovering the therapeutic benefits of crafting with their children. It’s not just about the end product; it’s about spending quality time, sharing ideas, and igniting creativity. Plus, who doesn’t love a fun, colorful project that can brighten a rainy afternoon?
Benefits and Best Occasions to Use It
Creating jellyfish from egg cartons encourages fine motor skills in children and stimulates creativity in adults. Imagine hosting a birthday party for your little one, and instead of traditional decorations, you fill the room with dazzling jellyfish, each an expression of individuality! They’re perfect for themed events, summer camps, or simply brightening up your living room on a dull day. Moreover, this project teaches the importance of recycling in a fun and engaging way, turning trash into treasure, which appeals to all ages!
Gathering Your Materials
Before you embark on this creative journey, let’s gather the materials you’ll need. You’ll be pleasantly surprised to realize that you probably have much of it lying around your home.
- Old egg cartons: These are the stars of the show! The cups will serve as the body of the jellyfish, so don’t toss them just yet!
- Acrylic paints: Look for vibrant colors that inspire you—the ocean is your palette.
- Paintbrushes or sponges: To apply those delightful hues onto your jellyfish.
- String or fishing line: This will help you hang your jellyfish, making them appear to swim through the air.
- Googly eyes: Because what’s a jellyfish without a gaze so whimsical?
- Scissors: For cutting and shaping the tentacles.
- Tissue paper or ribbons: For an extra touch of flair.
- Glue: You’ll need this for adhering all those creative elements together and for finishing touches.
Step-by-Step Instructions
Now that you have your materials ready, let’s dive into the creation process:
-
Preparation: Start by cutting the egg cartons into individual cups. This should be done carefully so as not to damage the structure. Each cup will become a jellyfish body, so aim for about three or four cups per jellyfish.
-
Painting: Channel your inner artist! Use acrylic paints to cover each cup in vibrant colors—think blues, pinks, purples, and contrasting hues. It’s fun to layer colors, letting some dry before adding more. This process helps create depth and dimension, just like real jellyfish glisten in the sea.
-
Creating Tentacles: Cut strips from the bottom of the egg carton or use tissue paper/ribbons to create long, flowing tentacles. These can be about 10-12 inches long, depending on how dramatic you want your jellyfish to look. You can also twist and curl them for a more whimsical effect.
-
Assembly: Once the paint dries, adhere the tentacles to the inside of the cup using glue. You can attach the googly eyes on the outer part of the cup to give your jellyfish a playful expression.
-
Hanging Your Jellyfish: Cut a piece of string or fishing line. Tie it to the center of the jellyfish’s body, allowing it to sway gently as if caught in an underwater current.
-
Display: Find a perfect spot for your jellyfish. Perhaps hang them from the ceiling in a cluster like they’re floating in an ocean of creativity. Arrange them near a window where they can catch the sunlight and cast colorful shadows.
Helpful Tips
- Color Combinations: Experiment with gradients or patterns. You could even use a sponge for unique textures.
- Personal Touches: Encourage kids to name their jellyfish and even create stories for them, fostering imaginative play and storytelling.
- Jellyfish Family: Make different sizes! Use larger egg cartons for bigger jellyfish or have a family of small ones.
Common Mistakes to Avoid
It’s easy to get excited and rush through a project, but here are a few pitfalls to watch out for:
- Paint Quality: Opt for good-quality acrylic paints. Cheaper brands may not adhere well or may look dull once dried.
- Safety First: If younger kids are involved, supervise during cutting and gluing. Sometimes the sticky glue is just too tempting!
- Tentacle Count: Don’t skimp on tentacles! A generous number gives your jellyfish character.
Creative Variations
Why stop at just jellyfish? Consider these fun ideas:
- Ocean Theme: Make other sea creatures—starfish, seahorses, or fish using similar techniques.
- Light-up Jellyfish: Use small LED lights inside the jellyfish for a magical glow, perfect for nighttime setups.
- Seasonal Decor: Switch up colors for different seasons—think pastel hues for spring or warm colors for fall.
Presentation Ideas
Once your jellyfish are complete, how you display them can elevate the whole craft. Think about creating an oceanic theme in your space:
- Hanging Displays: Use a hula hoop decorated with blue fabric or netting to create a more immersive experience. Hang your jellyfish from it at various heights.
- Underwater Vibe: Surround them with blue marbles or glass beads on a table or shelf to mimic the ocean floor.
Frequently Asked Questions
Can I use something other than egg cartons?
Absolutely! Toilet paper rolls or even plastic bottles could be reimagined into sea creatures with a little creativity.
How long will the jellyfish last?
If stored properly, away from direct sunlight, they can last for many months. Just be mindful of humidity that might warp the paper.
A Colorful Conclusion: Dive into Creativity
As you take a step back and admire your creations, there’s a profound sense of accomplishment in seeing discarded materials transformed into something whimsical and beautiful. Not only have you created a little marvel of artistry, but you’ve also shared moments of laughter, imagination, and connection with those around you. This simple DIY project is more than just craft; it’s about fostering creativity, embracing sustainability, and most importantly, celebrating the joyous art of making together.
So gather your loved ones, pull out those old egg cartons, and dive into crafting these delightful jellyfish. Who knows how many colorful adventures await your imagination?
Meta Description
Discover how to transform old egg cartons into vibrant jellyfish with this easy DIY project that promotes recycling while encouraging creativity in both kids and adults.
SEO Tags
- DIY Jellyfish
- Egg Carton Crafts
- Recycled Art Projects
- Kids Craft Ideas
- Creative Recycling
- Colorful Home Decor
- Family Activities