
Transforming Waste into Wonder: The Joy of Crafting a Plastic Bottle Flower Wind Chime
Transforming Waste into Wonder: The Joy of Crafting a Plastic Bottle Flower Wind Chime 🌸
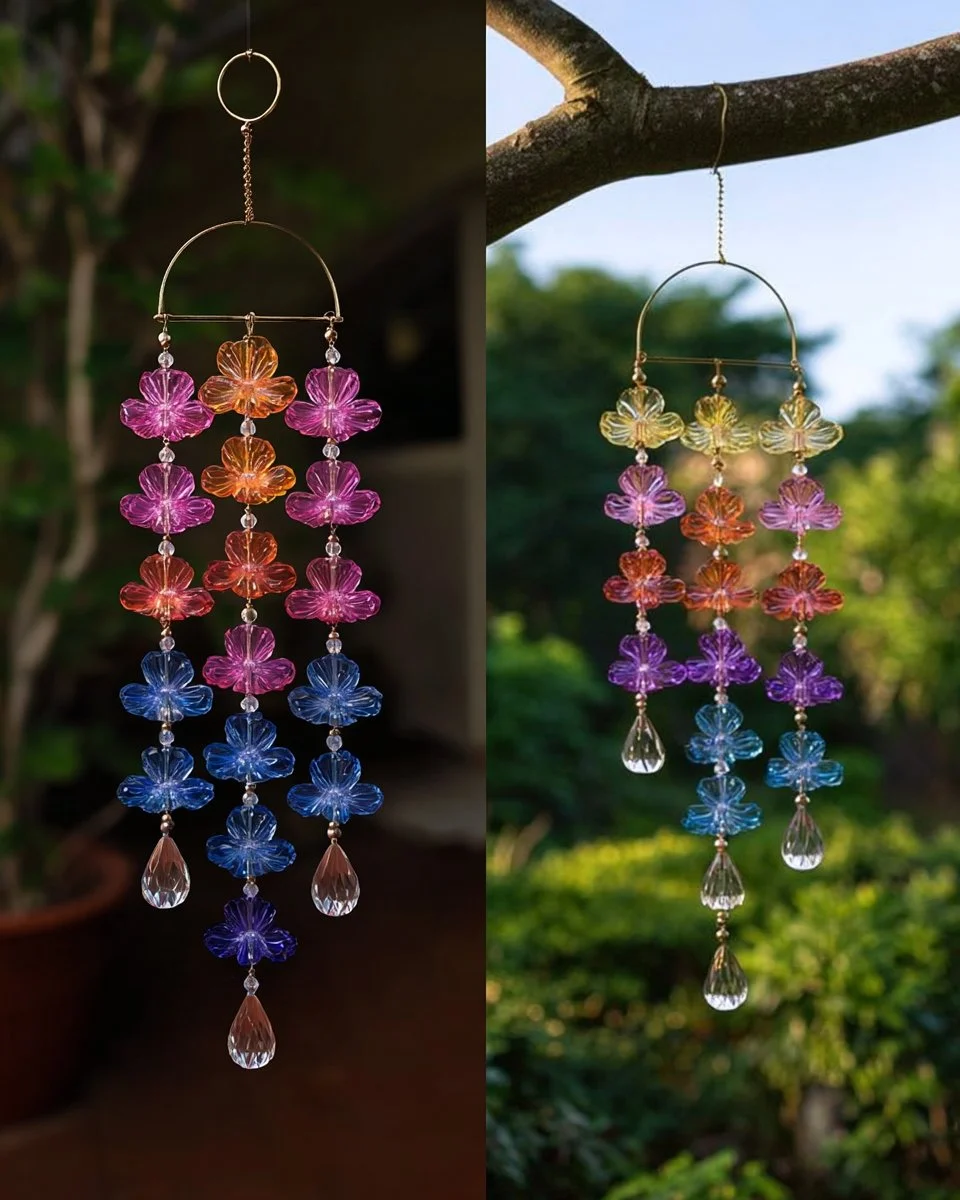
On a sunny summer afternoon, the gentle breeze wafts through your backyard, carrying with it the soft melodies of nature. You sip iced lemonade while watching the kids chase butterflies, their laughter blending harmoniously with the rustling leaves. Suddenly, something catches your eye — vibrant colors dancing in the wind, glinting under the sun. It’s a delightful wind chime made from recycled plastic bottles, transforming the ordinary into extraordinary and inviting a sense of joy into your outdoor space.
Creating a plastic bottle flower wind chime is not just a crafty project; it’s an emotional journey, a green initiative, and an artistic expression all rolled into one. It’s about breathing new life into forgotten materials and transforming them into stunning decorations that would adorn any garden, balcony, or patio. Let’s delve into the crafting of this vibrant piece of hanging décor that can brighten up your day while keeping our planet green.
Why People Love This Craft
There’s something incredibly satisfying about taking materials that would otherwise end up in a landfill and turning them into something beautiful. This craft resonates with anyone looking to add a personal touch to their outdoor space while also embracing sustainability. The sheer delight of watching your creation sway gently in the breeze, catching the sunlight and creating a symphony of colors and glimmers is a special kind of joy.
Beyond aesthetics, crafting a wind chime can be a wonderful family activity, sparking creativity in children and adults alike. It encourages teamwork, patience, and, of course, the glorious mess that comes with any art project. From the simplest designs to multifaceted creations, the possibilities are endless, promising an experience filled with laughter, learning, and shared memories.
Benefits and Best Occasions to Use Your Wind Chime
Not only does a flower wind chime make for a beautiful piece of décor, but it also carries substantial benefits. It is a charming garden mobile, a stunning balcony decoration, and even a sense of tranquility when hung near a sunny window. These wind chimes can be particularly uplifting in spaces where you seek peace and inspiration, making them perfect for yoga studios, meditation areas, or children’s playrooms.
Whether you’re welcoming spring, celebrating a birthday with a garden party, or simply looking to add vibrancy to your home, these DIY wind chimes serve various occasions. They can also be a heartfelt gift for friends and family, symbolizing creativity and sustainability.
Let’s Gather Our Supplies
Before diving into the process, let’s discuss the delightful materials we’ll need for this project:
- Colored Plastic Bottles (or clear bottles + paint): Choose your favorite hues, as bright translucent colors make for the prettiest flowers!
- Scissors/Craft Knife: Essential tools for crafting those floral shapes.
- String or Fishing Line: This will support your flowers as they hang.
- Beads/Crystals (optional): Add a touch of sparkle and personality.
- Glue: An essential for affixing decor and adding details.
- Metal Rings or Bottle Caps: These will serve as the connectors for your flowers.
- Wooden Hoop/Branch/Top Hanger: The base to create your wind chime.
Crafting Your Masterpiece: Step-by-Step Instructions
Step 1 — Cut the Flower Shapes
Begin the process by cutting off the bottom sections of your chosen plastic bottles. It’s delightful to see how these simple containers are transformed! Slice upward into petal strips, making sure to vary the lengths for an organic look. Round each strip into a flower shape, and behold as the bottle bottoms naturally create charming bell-shaped flowers!
Step 2 — Embellish with Paint
Grab your glass paint, spray paint, alcohol inks, or acrylic paints! Let your creativity run wild as you paint your petals in bright, translucent colors like azure, lavender, tangerine, and rosy pink. These colors not only brighten up your project but also capture the essence of a blooming flower garden. When the paint dries, the colors will glisten beautifully in sunlight.
Step 3 — Add Shine
To elevate your flowers, think about gluing on mirror pieces, rhinestones, or beads, adding a sparkle that catches the light. You might also consider sprinkling some glitter for that extra touch of whimsy. Don’t forget to wrap some silver tape around the necks of the bottles to create a polished, finished look.
Step 4 — String Them Together
Using your string or fishing line, thread through metal rings or tiny holes you’ve made near the tops of your flowers. Stack the flowers vertically, ensuring there is enough space between them to move freely in the breeze. If you want to add flair, place beads between the flowers for that extra charm!
Step 5 — Attach to a Base
All your hard work is finally coming together! Tie the strands to your chosen base — an embroidery hoop, driftwood, or even a sturdy branch. Make sure to secure it well; you want this beauty to twirl and chime gracefully wherever it’s hung, whether outdoors or just inside a bright window.
Extra Ideas ✨
Feeling adventurous? Consider inserting solar fairy lights inside the flowers or adding glow-in-the-dark paint to make them pop at night. A rainbow gradient arrangement will create a mesmerizing visual delight, while butterfly beads nestled between flowers add an enchanting detail. For that final touch, hang crystal drops at the ends for an elegant look.
Best Places to Hang Your Creation
Now that you’ve poured your heart and soul into creating this lovely piece, where should it reside? The best places to display your flower wind chime are:
- Balcony
- Patio
- Garden
- Pergola
- Sunny Window
- Kids’ Room
Each spot offers a wonderful opportunity to enhance your environment with color and charm.
Helpful Tips and Common Mistakes to Avoid
As you embark on this crafting adventure, here are some tips to remember:
- Choose the Right Bottles: Avoid using thick bottles; opt for the thinner, more flexible types for easier shaping.
- Take Your Time with Painting: Don’t rush the painting step; a good, even coating brings out the beauty in your creation.
- Strong Support is Key: Ensure your string or fishing line is robust enough to hold the weight of your flowers, preventing unwarranted breaks.
Frequently Asked Questions
Can the wind chime be made with any type of plastic bottle?
Yes! However, it’s best to choose ones that are flexible but sturdy, like soda or water bottles.
How long will the paint last outdoors?
Using outdoor-grade paint can extend the life of your decoration against the elements, but expect some fading over time.
What if I don’t have beads or crystals?
No problem! Nature can provide; consider incorporating twigs, pinecones, or shells for a rustic look.
Conclusion: A Crafting Journey of Joy
Creating your plastic bottle flower wind chime is more than just a project. It’s a journey filled with laughter, color, and the joy of transforming waste into something beautiful. As you hang your vibrant flowers, imagine the stories they will tell, the serene moments they will accompany, and the joy they will bring to every passerby.
So, gather your materials, invite the family, and celebrate the power of creativity! With each cut and paint stroke, remember that you’re contributing to a greener planet, one artistic endeavor at a time.
Let your flower wind chime ring out in harmony with the world around it, reminding us all of the beauty we can create from what we might otherwise discard. Happy crafting!
Meta Description
Discover the joy of creating a vibrant plastic bottle flower wind chime with this detailed guide. Transform waste into beauty, and add charm to your garden or balcony!
SEO Tags
- Plastic Bottle Crafts
- Wind Chime DIY
- Recycled Bottle Decoration
- Outdoor Home Decor
- Creative Reuse Projects
- Eco-Friendly Crafts
- Sustainable Living Ideas