
Create Stunning Clear Glue Mosaic Suncatchers Perfect for Any Window
Transform Your Space with Beautiful Clear Glue Mosaic Suncatchers
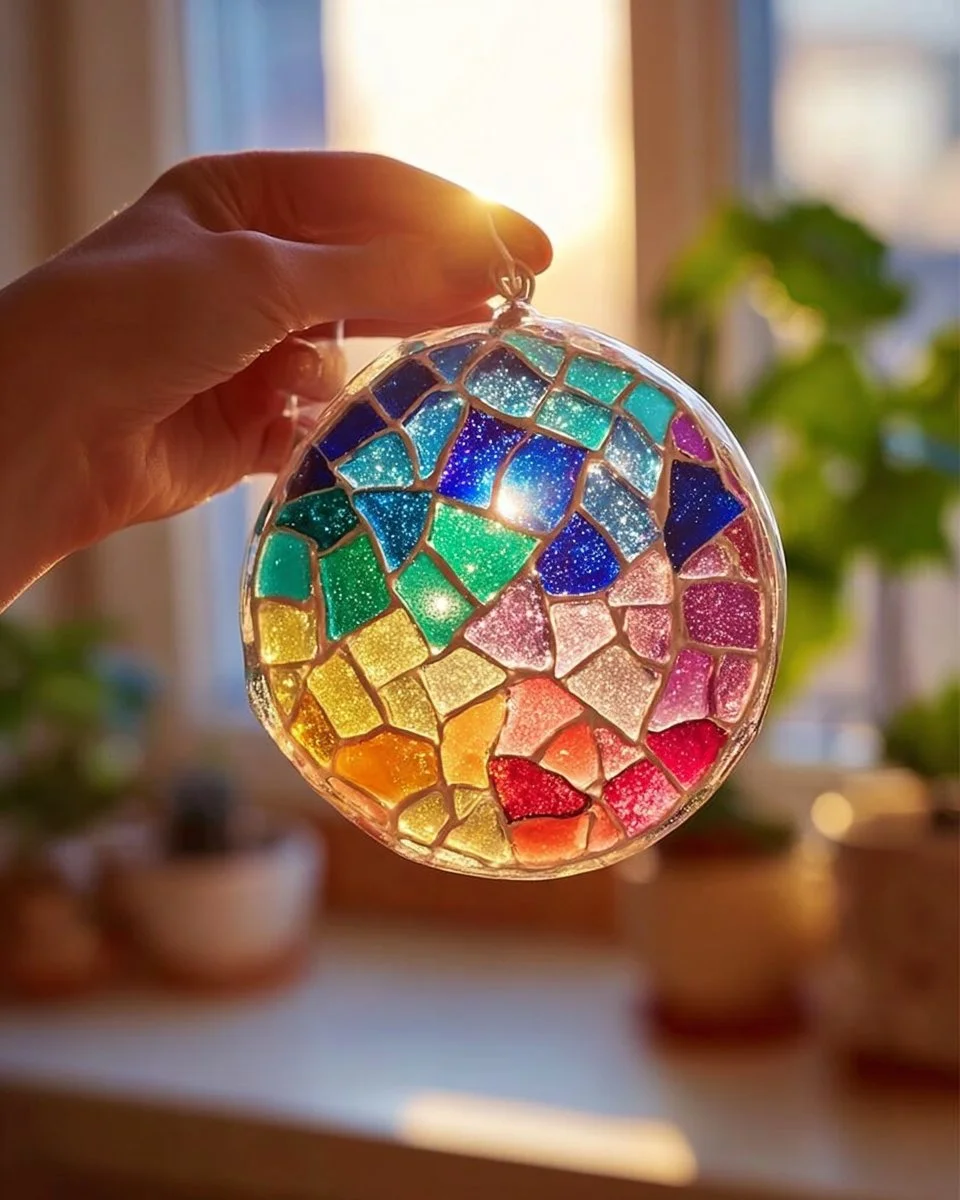
Imagine stepping into your sun-drenched living room on a bright afternoon. The sunlight streams through your window, awakening vibrant colors that dance joyously around the room, painting the walls with digital art of warmth and inspiration. This enchanting ambiance wraps around you like a comforting hug, a simple reminder of the little joys that light up our daily lives. Now picture yourself capturing that sun-kissed charm every single day, not just in a fleeting moment, but with your very own DIY clear glue mosaic suncatchers. If the thought excites your creative spirit as much as it stirs mine, gather your craft supplies and let’s embark on this colorful journey to transform your space into a vibrant sanctuary!
Why People Love This Craft
In a world often filled with noise and chaos, the act of crafting becomes a soothing oasis—a space where imagination runs wild, and joy takes center stage. Among the myriad of crafting options, mosaic suncatchers stand out with their unique ability to turn simple materials into radiant beauty. They evoke nostalgia, tugging at our heartstrings and reminding us of childhood arts and crafts, while creating a magical connection with nature as they refract light into stunning rainbows.
However, this craft is so much more than just decor; it’s a heartfelt activity that unites generations. Children can unleash their creativity, exploring color and form, while adults bask in the therapeutic rhythm of gluing pieces together. Moreover, there’s something deeply satisfying about watching your handiwork catch the light, casting a playful kaleidoscope of colors across your home—a personal touch that mass-produced items simply can’t replicate.
Benefits and Best Occasions to Use Suncatchers
The allure of suncatchers transcends mere aesthetics. Let’s explore some of the delightful privileges they bestow:
-
Enhance Your Home Decor: Whether your aesthetic leans towards minimalist chic or bohemian whimsy, these suncatchers bring character and charm into any room, instantly breathing life and personality into your space.
-
Make Heartfelt Gifts: In a world inundated with commercial goods, handmade gifts always carry a personal touch. Imagine giving a beautifully crafted suncatcher as a birthday present; the recipient will cherish it far more than a store-bought item.
-
Serve as Seasonal Decorations: The beauty of these suncatchers lies in their adaptability. By switching out colors or designs in alignment with the changing seasons, you can usher in a fresh look year-round, ensuring your home remains vibrant and inviting.
-
Indulge in Family Bonding: Crafting suncatchers together fosters creativity and communication, creating precious memories as you laugh and inspire one another. Whether it’s a rainy weekend or a quiet evening after dinner, this craft brings loved ones together in the simplest yet most profound ways.
Consider crafting suncatchers for festive seasons or special occasions—imagine the joy of hanging a brilliant floral design to celebrate spring blooms, or vibrant reds and greens to usher in the holidays.
The Materials You’ll Need
Creating your own mosaic suncatchers is a simple yet rewarding endeavor! Here’s what you’ll want to gather. But remember, this is your opportunity to let your creativity soar, so feel free to improvise!
-
Clear glue (like school glue or clear-drying craft glue): This forms the base for your mosaic, providing the sticky embrace that holds it all together.
-
Transparency sheets or plastic lids: Serving as the canvas for your beautiful mosaic artwork.
-
Colored tissue paper or cellophane: These lightweight materials add vibrant bursts of color to your creation, transforming light into a rainbow of hues.
-
Scissors: Essential for turning your decorative pieces into shapes that spark imagination.
-
A small paintbrush: Perfect for applying glue evenly, ensuring a smooth finish.
-
Optional embellishments: Think beads, glitter, or sequins to add extra layers of sparkle. Each added detail tells a story and invites a bit of your personality into the craft.
Isn’t it incredibly inviting to consider the myriad of colors and shapes you can play with?
Step-by-Step Instructions
Prepare Your Workspace
Start by finding a flat surface to work on. Cover it with newspaper or an old cloth to keep things tidy. Gather all your materials within arm’s reach, making your crafting even more enjoyable.
Cut Your Colored Pieces
Take your scissors and start cutting the tissue paper or cellophane into shapes—let loose! They can be squares, hearts, or whimsical patterns straight from your imagination. Play around with different sizes and colors; after all, the more vibrant, the better!
Apply the Glue
Pour a small amount of clear glue onto your transparency sheet or plastic lid. With your paintbrush, spread a thin layer of glue evenly across the surface, setting the stage for your colorful masterpiece.
Start Placing Your Pieces
Here comes the fun part! Start placing your cut-up colored pieces onto the glued surface. Let your creativity flow—overlap pieces to create depth and allow your inner artist to shine. Embrace the spontaneity of your design; each layer adds uniqueness.
Seal It Up
Once you’re satisfied with your creation, gently brush a layer of glue over the top of your mosaic. This final touch not only gives it a glossy finish but also keeps the pieces securely in place.
Let It Dry
Find a safe place for your masterpiece to dry completely—this may take a few hours. The transparency of the glue will allow light to dance through beautifully once it cures.
Hang Your Suncatcher
Once dry, it’s time to find the perfect spot in your window to showcase your creation. Use a suction cup hook or a simple string to hang it where it can capture the light and radiate joy throughout your space.
Helpful Tips Along the Way
-
Mix Up the Shapes: Incorporate various shapes—circles, triangles, even abstract designs—to create an engaging composition that draws the eye.
-
Stay Light: It’s tempting to slather on the glue, but keep it to a thin layer. Too much glue can weigh down the pieces and make them less vibrant.
-
Test Your Colors: Before diving headfirst into your masterpiece, create a small sample to see how your colors play together in the light. It’s a great way to plan your final design!
Common Mistakes to Avoid
-
Using Too Much Glue: You might feel tempted to use more glue, as if you’re crafting a masterpiece! But remember, excess glue can create a tacky finish and delay drying.
-
Ignoring Drying Time: Patience is crucial. Allow your suncatcher ample time to dry; rushing through this step can lead to smudging or, worse, pieces falling off.
-
Forgetting to Seal It: Skipping the final layer of glue is a rookie mistake! This seals your pieces and gives that luscious glossy finish we all adore.
Creative Variations
Once you’ve mastered the basics, it’s time to let your imagination run wild! Create themed suncatchers that capture various seasons or holidays. For spring, opt for soft pastels resembling blooming flowers. In autumn, use rich oranges and browns to mirror the foliage. You could even coordinate your suncatcher with your favorite holiday colors for a personal touch in your seasonal decor.
Display and Presentation
When it comes to showcasing your suncatchers, consider hanging multiple pieces in a cluster for a stunning visual effect. Larger suncatchers paired with smaller ones can create a beautiful tapestry of colors and shapes, capturing attention and admiration. Perhaps establish a themed window space that reflects a warm holiday spirit or your distinctive artistic flair—allow your suncatchers to tell a story!
Maintenance Tips
To preserve the vibrant beauty of your suncatchers, gently wipe them down with a damp cloth when needed. Avoid harsh chemicals, as they might diminish the glossy shine of your glue. When not in use, store your suncatchers safely, ensuring they maintain their brilliance for many days to come.
Frequently Asked Questions
Can I use regular school glue?
Absolutely! Just ensure it’s clear-drying for the best results.
How long do they last?
With proper care, your suncatchers can last indefinitely, bringing joy to your space for years to come.
Can I make them outdoor-friendly?
Yes! For outdoor use, simply choose appropriate materials to hang them outside. Just be sure your artwork is sheltered from direct rain.
A World of Color Awaits
Crafting your own clear glue mosaic suncatchers is more than a simple DIY project; it’s an open invitation to connect with friends and family, letting your unique creativity shine brightly against the ordinary fabric of everyday life. Each piece you create adds a splash of color to your home, but more importantly, stitches treasured memories together with every brushstroke of glue.
So, gather your materials, let your imagination flow, and transform your windows and your heart with these delightful suncatchers—because life is far too beautiful to be seen through a plain pane of glass. Are you ready to get crafting?
SEO Meta Description: Transform your space with beautiful clear glue mosaic suncatchers! A perfect DIY craft for all ages; follow our simple steps for vibrant decor that brightens your windows.
SEO Tags: #MosaicCraft #Suncatcher #DIYHomeDecor #Crafting #HomeDecor #ArtProjects #SuncatcherDIY