
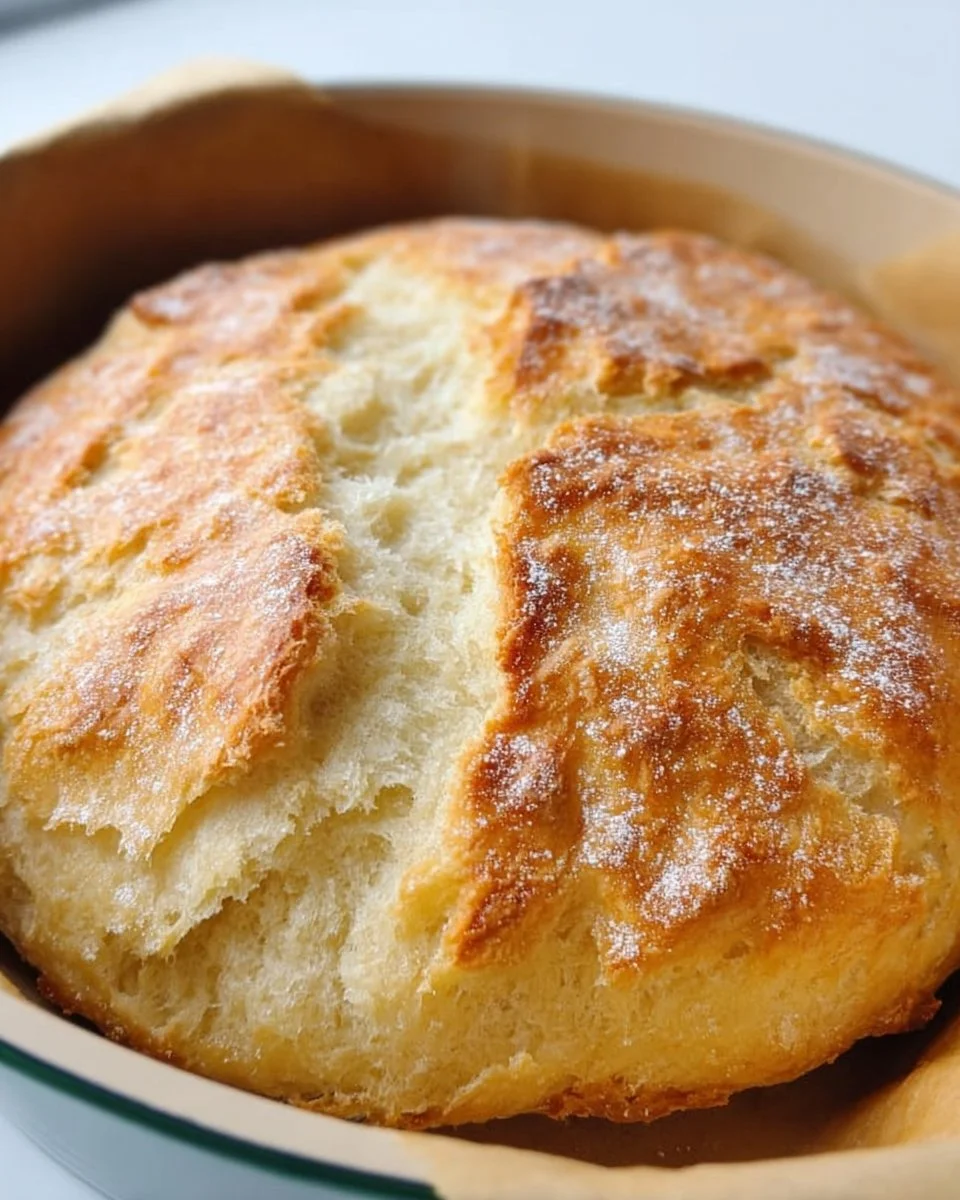
No-Knead Bread
The kitchen fills with a warm, inviting embrace as the aromas of baking bread swirl around you, tickling your senses and awakening your appetite. The crust, golden and crackling, beckons with its promise of warmth and comfort. As you slice into the loaf, the texture reveals itself—craggy, airy, and yet so satisfying. Each piece emerges with steam bursting from the center, releasing the subtle notes of baked goodness that bring memories of togetherness and joy. This isn’t just any bread; it’s a no-knead masterpiece that transforms simple ingredients into something magical, something that needs no expert hands, only a little time and love.
Imagine the pleasure of sharing a slice with loved ones, hot from the oven, perhaps slathered with rich, creamy butter that melts into every nook and cranny. Picture enjoying it alongside a warm bowl of soup or piled high with your favorite toppings. Each chew yields a symphony of flavors: the nutty undertones of the flour, the slight tang from the yeast, and the delicate crunch of the crust. And the best part? It requires minimal effort. This method invites you to indulge in the process while allowing nature to work its magic. Isn’t it time to experience the delight of freshly baked bread in your home?
Why You’ll Love This No-Knead Bread
This no-knead bread is not just a recipe; it’s a celebration of simplicity and flavor that redefines what home-baked bread can be. The allure of this method lies in its hands-off approach—mixing, resting, and baking—allowing you to engage in life while your dough does the heavy lifting. You will relish the wonderful crust, a textural delight that crackles under your knife, giving way to a soft, pillowy interior that you will want to munch on endlessly.
Perfect for every occasion, this bread can enhance a cozy family dinner, impress guests at your next gathering, or simply serve as the backdrop for your favorite spreads. Whether you’re dipping it into olive oil, accompanying a rich stew, or pairing it with a vibrant salad, this bread stands out with its artisanal charm. With each bite, you’ll taste the care and patience that transformed humble ingredients into a true masterpiece.
Preparation Phase & Tools to Use
To embark on your no-knead bread journey, you don’t need a professional kitchen; just a few essential tools will do the job, each playing a vital role in your bread-making adventure.
- Large Mixing Bowl: A sturdy bowl allows space for the dough to grow and develop, creating the structure needed for an airy loaf.
- Plastic Wrap: This helps trap warmth and moisture, crucial for the dough’s fermentation process.
- Dutch Oven: A heavy pot that mimics a professional baking environment, ensuring even heat distribution and moisture retention for that crusty exterior.
- Parchment Paper: Prevents sticking and makes transferring your dough to the hot pot effortless and mess-free.
Preparation tips to keep in mind:
- Ensure you choose a warm spot for the dough to rise; a cozy corner of your kitchen often works wonders.
- Use room temperature water for mixing; it helps activate the yeast effectively.
- Do not rush the process; the long rise time is critical for flavor development.
Ingredients for No-Knead Bread
- 3 cups all-purpose flour: The foundation of your loaf. Feel free to experiment with whole wheat or gluten-free flour for variety.
- 1 1/4 teaspoons salt: Enhancing flavor and controlling fermentation; don’t skimp on this essential ingredient.
- 1/2 teaspoon active dry yeast: A small amount goes a long way in helping your dough rise beautifully.
- 1 1/2 cups warm water: The warmth helps activate the yeast effectively—aim for a comfortable temperature, around 110°F (43°C).
How to Make No-Knead Bread
- In a large bowl, combine the flour, salt, and yeast using a gentle stirring motion to blend thoroughly.
- Pour in the warm water, mixing until a shaggy, sticky dough forms. It’s okay if it looks messy; that’s part of the magic!
- Cover the bowl tightly with plastic wrap. Allow the dough to rise at room temperature for 12 to 18 hours. This long fermentation creates complex flavors and a delightful texture.
- Once the dough has risen and bubbles appear on the surface, gently shape it into a ball without kneading it—embrace the stickiness!
- Let the shaped dough rest for about 30 minutes to relax.
- Preheat your oven to 450°F (230°C) and place a Dutch oven inside to heat for about 30 minutes. This step produces the perfect crust.
- Carefully remove the hot Dutch oven, and lift the dough using the edges of the parchment paper. Place it inside, cover with the lid, and bake for 30 minutes.
- After 30 minutes, remove the lid and continue to bake for an additional 15-20 minutes, until the top is a glorious golden brown.
- Allow the loaf to cool on a wire rack before slicing; this step ensures the crumb sets beautifully.
Chef’s Notes & Helpful Tips
- Make-ahead tips: Prepare the dough the night before for fresh bread in the morning; it’s the perfect way to start the day.
- Cooking alternatives: If you don’t have a Dutch oven, any oven-safe pot or cast-iron skillet will work. Just ensure it has a lid.
- Customization ideas: Elevate your bread with mix-ins! Add herbs, cheese, or olives during the initial mixing phase for an extra flavor kick.
Common Mistakes to Avoid
To ensure your no-knead bread emerges perfectly every time, watch out for these common pitfalls:
- Rushing the rise: Don’t skip the long fermentation process. Patience is key to achieving that exquisite flavor.
- Not using enough water: A stickier dough often leads to a better loaf; don’t shy away from hydration.
- Not preheating the pot: Skipping this step can result in a lackluster crust. Make sure to let your Dutch oven get piping hot!
What to Serve With No-Knead Bread
This no-knead bread serves as a flexible partner for a myriad of delicious dishes. Here are a few ideas to pair:
- Homemade Soups: The bread’s crusty exterior offers a delightful contrast to warm, creamy soups like tomato basil or butternut squash.
- Cheese Platters: Its rustic charm complements a variety of cheeses. Imagine a sharp cheddar or a soft brie, perfectly paired with your bread.
- Bruschetta Toppings: Use slices of the bread as a base for fresh tomatoes, basil, and balsamic reduction for a garden-fresh appetizer.
- Hearty Salads: Serve alongside kale or quinoa salads, where the crunch of the bread balances the textures and flavors.
- Olive Oil and Balsamic Vinegar: Make a simple dipping station with high-quality oil and vinegar for a traditional Italian touch.
- Breakfast Spreads: Enjoy a slice topped with avocado, a sprinkle of salt, and drizzle of olive oil as a delicious breakfast option.
Storage & Reheating Instructions
To keep your no-knead bread fresh, store it at room temperature in a paper bag for up to 3 days. For longer storage, wrap the loaf tightly in plastic wrap and then aluminum foil, placing it in the freezer for up to 3 months. When you’re ready to indulge again, simply thaw at room temperature or warm in an oven at 350°F (175°C) for about 10-15 minutes until heated through.
Estimated Nutrition Information
While bread is a delightful comfort food, keep in mind that nutrition can vary. A standard slice of this no-knead bread contains approximately:
- Calories: 80
- Protein: 2g
- Carbohydrates: 16g
- Fat: 0.3g
- Fiber: 0.5g
These values are estimated and may vary based on ingredient variations and serving sizes.
FAQs
1. Can I use whole wheat flour instead of all-purpose flour?
Absolutely! Whole wheat flour will give your bread a nuttier flavor and denser texture, although it may require a touch more water due to its higher absorbency.
2. How can I tell when the bread is done baking?
A golden-brown crust is your main indicator. Additionally, you can check for doneness by tapping the bottom of the loaf; it should sound hollow when fully baked.
3. Is it possible to make this bread without a Dutch oven?
Yes! You can use an oven-safe pot with a tight-fitting lid or even an old cast iron skillet; just ensure a lid for steam retention during the first half of baking.
4. Can I add flavorings like garlic or herbs?
Certainly! Feel free to fold chopped herbs, minced garlic, or even cheese into your dough during the mixing stage to enhance the flavor profile.
5. What if my dough doesn’t rise?
If your dough fails to rise, it may be due to inactive yeast. Ensure your yeast is fresh and check that you’re using warm—not hot—water to activate it.
Inhaling the rich, intoxicating aroma of freshly baked bread as it fills your home offers a sense of satisfaction that words can hardly capture. This no-knead bread not only promises to delight during meals but also creates a space for connection and enjoyment. With its simple ingredients and straightforward method, you can craft a hearty loaf that elevates any gathering or quiet moment at home. Savor the experience—both of baking and of sharing this beautiful creation. After all, delicious memories begin with a single slice of freshly baked bread. So why not let that first slice be today?
Print
No-Knead Bread
- Total Time: 75 minutes
- Yield: 1 loaf 1x
- Diet: Vegetarian
Description
A simple and flavorful no-knead bread recipe that transforms basic ingredients into a delicious artisanal loaf.
Ingredients
- 3 cups all-purpose flour
- 1 1/4 teaspoons salt
- 1/2 teaspoon active dry yeast
- 1 1/2 cups warm water
Instructions
- Combine the flour, salt, and yeast in a large bowl, stirring to blend.
- Pour in the warm water and mix until a shaggy, sticky dough forms.
- Cover the bowl tightly with plastic wrap and let it rise at room temperature for 12 to 18 hours.
- Gently shape the risen dough into a ball without kneading it.
- Let the shaped dough rest for about 30 minutes.
- Preheat the oven to 450°F (230°C) with a Dutch oven inside for about 30 minutes.
- Carefully remove the hot Dutch oven, lift the dough using parchment paper, and place it inside.
- Cover with the lid and bake for 30 minutes.
- Remove the lid and bake for an additional 15-20 minutes until golden brown.
- Cool on a wire rack before slicing.
Notes
For added flavor, mix in herbs or cheese during the initial mixing phase. Store at room temperature for up to 3 days or freeze for up to 3 months.
- Prep Time: 15 minutes
- Cook Time: 60 minutes
- Category: Bread
- Method: Baking
- Cuisine: Italian
Nutrition
- Serving Size: 1 slice
- Calories: 80
- Sugar: 0g
- Sodium: 300mg
- Fat: 0.3g
- Saturated Fat: 0g
- Unsaturated Fat: 0g
- Trans Fat: 0g
- Carbohydrates: 16g
- Fiber: 0.5g
- Protein: 2g
- Cholesterol: 0mg
Keywords: no-knead bread, baking bread, homemade bread